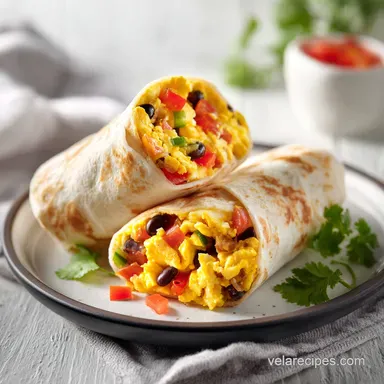
Make Ahead Breakfast Burritos: Smoky and Hearty
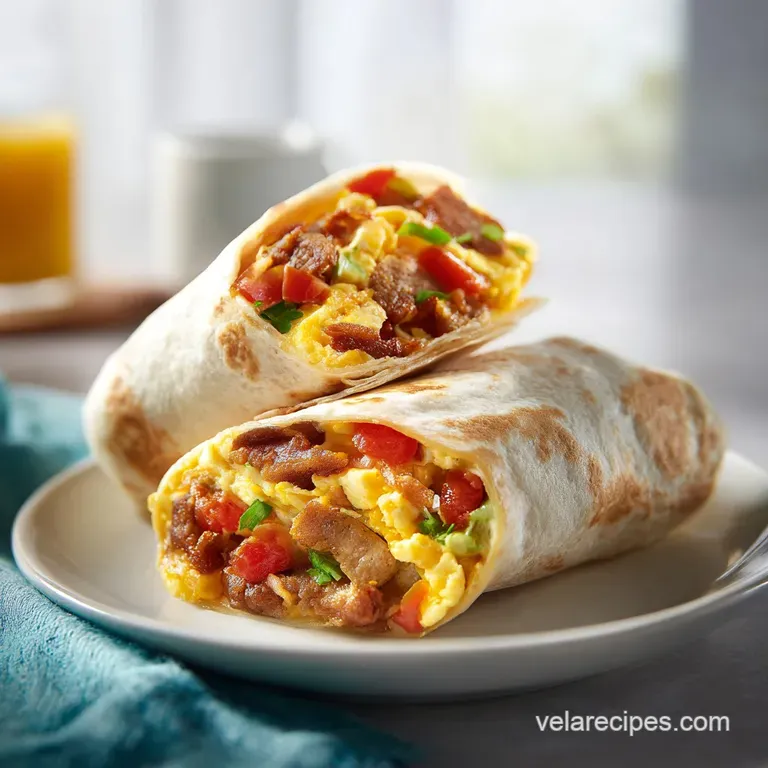
- Time:20 minutes active + 15 minutes cooling = 55 minutes total
- Flavor/Texture Hook: Velvety scrambled eggs paired with a smoky, charred vegetable crunch
- Perfect for: Effortless weekday mornings and easy office meal prepping
- Create the best make ahead breakfast burritos
- Recipe Specs and Practical Details
- Essential Ingredients for Better Value
- Necessary Gear for Your Kitchen
- Master the Full Cooking Steps
- Solve Common Breakfast Preparation Problems
- Tasty Variations for Every Morning
- Proper Storage and Reheating Methods
- Beautiful Presentation for Joyful Meals
- Very High in Sodium
- Recipe FAQs
- 📝 Recipe Card
Create the best make ahead breakfast burritos
There is nothing quite as disappointing as pulling a breakfast wrap out of the microwave only to find it’s turned into a gummy, translucent mess. I remember my first attempt at prepping these; I was so excited to have a month of "easy" mornings, but I didn't realize that packing hot eggs directly into a flour tortilla is basically like giving your breakfast a steam bath.
The result? A rubbery texture that even a gallon of hot sauce couldn't fix.
We are solving that problem today with a method that prioritizes texture and flavor without adding unnecessary complexity to your Sunday afternoon. By focusing on a "Hard Sear" for your veggies and a dedicated "Flash Cool" step, we can create a breakfast that actually feels like it came off a griddle rather than out of a freezer bag.
This is about making your future self very, very happy when that Tuesday morning alarm goes off.
You'll find that this approach is all about the little things the way we season the sausage, the specific order of the layers, and how we handle the heat. It’s a joyful way to reclaim your mornings.
We are going to walk through how to keep those eggs velvety and that tortilla structure sound, ensuring every bite is as good as the first one you ever had at your favorite diner.
Recipe Specs and Practical Details
The Moisture Trap: Most people fail because they don't realize that vegetables are mostly water. When you sauté onions and peppers, that water needs to go somewhere. If it doesn't evaporate in the pan, it ends up in your tortilla.
The Lipid Barrier: Fat and water don't mix. By placing our 2 cups of shredded sharp cheddar cheese directly against the tortilla, we create a waterproof seal. This prevents the moisture from the eggs and sausage from soaking into the flour wrap during storage.
Carryover Management: Eggs are delicate. If you cook them until they look "perfect" in the pan, they will be overcooked and rubbery by the time you reheat them. We scramble them until they are just barely set, letting the residual heat and the eventual reheating process do the rest of the work.
| Method | Time | Texture | Best For |
|---|---|---|---|
| Stovetop | 5 minutes | Crispy and charred | Immediate weekend eating |
| Oven | 15 minutes | Soft and even | Reheating multiple frozen burritos |
| Air Fryer | 8 minutes | Shatter crisp shell | The ultimate "fresh tasting" reheat |
The choice of method really depends on how much time you have. If I’m in a hurry, the microwave is fine, but if I want that "shatter" texture on the outside of the tortilla, I always go for the stovetop or air fryer. The oven is brilliant if you're feeding the whole family at once.
| Component | Science Role | Pro Secret |
|---|---|---|
| 12 large eggs | Protein structure | Whisk with milk to buffer protein strands for softness |
| 0.25 cup whole milk | Tenderness agent | The fat prevents the eggs from becoming a rubbery sponge |
| 1 lb ground sausage | Flavor and fat base | Brown it deeply to create crusty bits that hold up to freezing |
Essential Ingredients for Better Value
To make these make ahead breakfast burritos truly work for your budget and your palate, we need to be smart about what goes into the skillet. We are using 1 lb of ground breakfast sausage as our primary protein because it's packed with seasoning already, saving us from buying five different spices.
- 1 lb ground breakfast sausage: The heart of the wrap. Why this? Provides essential fats and salt that carry flavor through the freezing process.
- 1 large red bell pepper, finely diced: For sweetness and color. Why this? Adds a fresh bite that cuts through the heavy fats.
- 1 medium yellow onion, finely diced: The aromatic base. Why this? Becomes sweet and jammy when seared properly.
- 1 tsp smoked paprika & 0.5 tsp cumin: Our flavor boosters. Why this? Adds depth without needing a dozen individual spices.
- 12 large eggs: The main volume. Why this? Affordable protein that stays velvety when handled with care.
- 0.25 cup whole milk: For texture. Why this? Keeps the eggs from drying out during the second cook (reheating).
- 0.5 tsp kosher salt & 0.25 tsp cracked black pepper: Basic seasoning.
- 1 tbsp unsalted butter: For the scramble.
- 8 large flour tortillas: Our structural vessel.
- 2 cups sharp cheddar cheese, shredded: Our moisture barrier.
- 1 cup cooked black beans, rinsed and dried: For fiber and texture. Why this? Adds bulk cheaply while providing a nice earthy contrast.
| Original Ingredient | Substitute | Why It Works |
|---|---|---|
| Breakfast Sausage | Ground Turkey + Sage | Leaner option; sage mimics that classic "breakfast" flavor profile |
| Sharp Cheddar | Pepper Jack | Adds a spicy kick. Note: Melts similarly but alters flavor |
| Whole Milk | Unsweetened Almond Milk | Works fine for texture, though slightly less "creamy" than dairy |
Necessary Gear for Your Kitchen
You don't need a professional kitchen to pull this off, but a few specific tools will make the 20 minutes of prep and 20 minutes of cooking feel effortless.
I always reach for my large cast iron skillet (like a Lodge) for the sausage and veggies because it holds heat so well, but a standard non stick pan is non negotiable for those 12 eggs.
You'll also want a large rimmed baking sheet. This isn't for cooking it’s for the cooling stage. Spreading the hot filling out on a wide surface area is the only way to get it to room temperature in that 15 minute window.
If you leave it in a deep bowl, the center will stay hot for an hour, which is exactly how you end up with soggy tortillas.
Finally, grab some parchment paper and aluminum foil. The double wrap method is the secret to preventing freezer burn. The parchment keeps the foil from sticking to the tortilla, and the foil provides the airtight seal you need for long term storage. If you're interested in more easy morning prep, you might want to look at my egg muffin cups which use similar ingredients in a different format.
Master the Full Cooking Steps
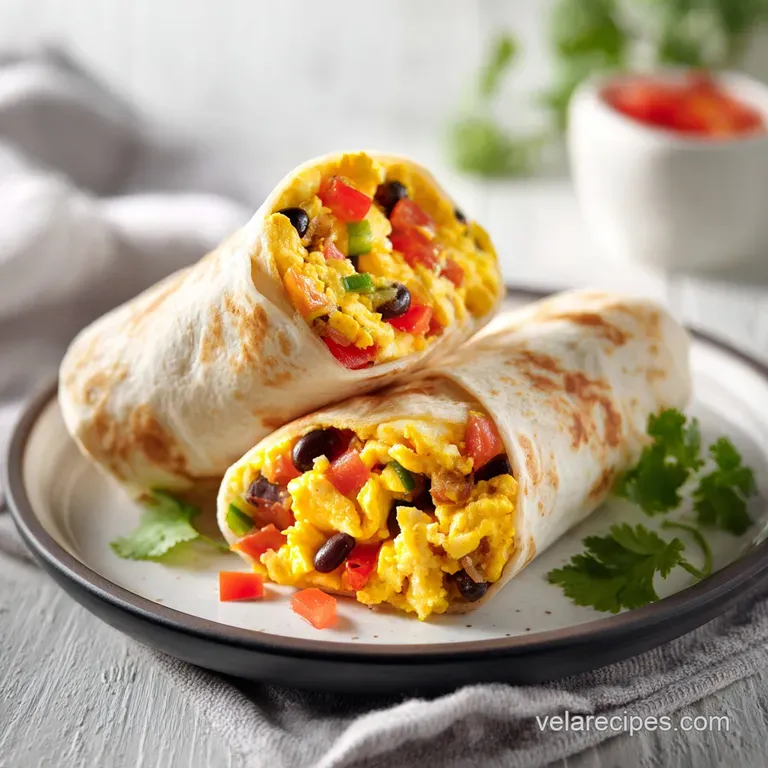
- Sauté the vegetables. Place the diced red bell pepper and yellow onion into a over high heat skillet. Perform a 'Hard Sear' by cooking until moisture evaporates and edges are lightly charred. Stir in the 1 tsp smoked paprika and 0.5 tsp cumin in the last minute. Note: Charring adds a smoky depth that mimics a grill.
- Brown the sausage. In a large skillet, cook the 1 lb ground breakfast sausage until fully browned and crumbly, usually about 8 minutes. Drain the excess fat thoroughly into a heat safe container. Note: This step is vital to prevent future sogginess.
- Prepare the egg base. In a large bowl, whisk the 12 eggs with 0.25 cup whole milk, 0.5 tsp kosher salt, and 0.25 tsp black pepper until no streaks of yolk remain.
- Scramble the eggs. Melt 1 tbsp butter in a non stick skillet over medium low heat. Add the egg mixture and scramble until just set but still tender. Note: They should look slightly wet as they'll continue cooking slightly from residual heat.
- Flash cool the filling. Spread the cooked eggs, sausage, and seared vegetables onto a large rimmed baking sheet. Let them rest for 15 minutes until they reach room temperature. Note: This prevents steam from being trapped in the wrap.
- Prep the tortillas. Lay out the 8 large flour tortillas on a clean surface. If they feel stiff, microwave them for 10 seconds to make them pliable.
- Create the cheese barrier. Distribute the 2 cups of shredded sharp cheddar evenly across the center of each tortilla. Note: The cheese must go down first to protect the tortilla from moisture.
- Layer the fillings. Top the cheese with the cooled egg mixture, the sausage veggie blend, and the 1 cup of rinsed/dried black beans.
- Fold and roll. Fold the left and right sides of the tortilla inward, then roll from the bottom up as tightly as possible until the seam is tucked underneath.
- Wrap for storage. Individually wrap each burrito in a square of parchment paper, then tightly in aluminum foil.
Solve Common Breakfast Preparation Problems
One of the biggest issues people face when making ahead breakfast burritos is the "blowout" where the tortilla splits open during the rolling process. This usually happens because the tortillas are too cold or they have been sitting in a dry pantry for too long.
A quick 10 second blast in the microwave with a damp paper towel fixes the elasticity immediately.
Another common complaint is the "bland" center. Because freezing dulls flavors slightly, we use smoked paprika and cumin during the veggie sear to ensure the spices are "locked" into the fiber of the peppers and onions.
If your beans are too wet, they will also contribute to a mushy interior, so make sure they are patted dry with a paper towel after rinsing.
Why Your Burritos Leaky
If you find liquid pooling at the bottom of your wrap, it’s almost always because the vegetables weren't seared long enough or the sausage wasn't drained. That fat and vegetable liquor has nowhere to go but into the tortilla.
| Problem | Root Cause | Solution |
|---|---|---|
| Gummy Tortilla | Filling was too hot during assembly | Use the baking sheet cooling method for 15 minutes |
| Rubbery Eggs | Overcooked during the initial scramble | Pull eggs off the heat while they still look slightly "shiny" |
| Tortilla Cracking | Tortilla is too dry or cold | Steam briefly or use room temperature wraps only |
Common Mistakes Checklist
- ✓ Drain the sausage fat completely before adding to the mix.
- ✓ Ensure the black beans are bone dry after rinsing.
- ✓ Never skip the 15 minute cooling period on the baking sheet.
- ✓ Always place the cheese layer first to act as a moisture shield.
- ✓ Wrap tightly to remove as much air as possible before freezing.
Tasty Variations for Every Morning
While the classic sausage and egg combo is a winner, you can easily adapt this to fit your dietary needs or just to keep things interesting. If you're looking for healthy make ahead breakfast burritos, consider swapping the pork sausage for ground turkey. It’s a leaner protein that still takes on the flavors of the cumin and paprika beautifully.
For those who want a meat free start to the day, making ahead breakfast burritos vegetarian is as simple as doubling the black beans and adding some sautéed mushrooms for that "meaty" umami hit.
I’ve found that a little bit of roasted sweet potato also adds a wonderful creaminess that replaces the fat from the sausage.
For a "Work Friendly" Spicy Kick
If you like heat but don't want to carry a bottle of hot sauce to the office, dice up a small jalapeño (remove the seeds for less heat) and sear it right along with your bell peppers.
The heat will distribute evenly throughout the filling, giving you that spicy punch in every bite without the mess of liquid salsa.
Healthy make ahead Breakfast Burritos (Lower Calorie)
To lighten things up, you can use egg whites for half of the egg count and swap the whole milk for a splash of water. Use a low carb tortilla and stick to a sharp white cheddar you can use less of it because the flavor is so much more intense than mild cheddar.
| Premium | Budget | Flavor Impact | Savings |
|---|---|---|---|
| Chorizo | Sausage + Paprika | Similar spice, less grease | Save $2-3 per batch |
| Fresh Salsa | Canned Diced Chilies | Less bright but stays drier | Save $1.50 per batch |
| Organic Eggs | Store Brand Eggs | Minimal in a mixed burrito | Save $3-4 per batch |
Proper Storage and Reheating Methods
The beauty of this recipe is that it’s designed for the long haul. Once your burritos are double wrapped in parchment and foil, they can live in your freezer for up to 3 months. I recommend labeling them with the date and the flavor (if you made variations) using a permanent marker on the outside of the foil.
To reheat from frozen, you have two main paths. If you're using a microwave, remove the foil but keep the parchment paper on. Microwave on 50% power for 2 minutes, then flip and go for another 1 minute on high.
Let it sit for 60 seconds this is crucial for the heat to redistribute so you don't get a "lava center" with "ice corners."
If you have a few extra minutes, the air fryer is my absolute favorite way to reheat. Take it out of the foil and parchment, and air fry at 180°C (about 350°F) for 8-10 minutes. The outside gets incredibly crispy, almost like a chimichanga, but without the deep frying. For a sweet contrast to these savory wraps, you might enjoy my blueberry pancakes on the weekends when you have more time to linger over the stove.
Zero Waste Tip: Don't toss those onion skins or pepper scraps! Throw them into a freezer bag. Once the bag is full, simmer them with some water to create a quick vegetable stock for your next soup or stew.
Beautiful Presentation for Joyful Meals
Even though these are "grab and go" meals, that doesn't mean they can't look appetizing. If you're serving these for a casual weekend brunch, I love to slice them on a sharp diagonal. This shows off the beautiful layers of yellow egg, red pepper, and dark beans.
It makes the meal feel intentional rather than just a quick fix.
You can also set up a "dipping station" if you're eating these at home. A small bowl of Greek yogurt (a great high protein swap for sour cream), some fresh cilantro, and a lime wedge can transform a frozen burrito into a gourmet experience. It adds a freshness that brings the whole dish back to life.
The Diagonal Cut: Using a serrated knife to slice the burrito at a 45 degree angle not only looks professional but also makes it easier to eat. It creates a larger surface area for dipping into your favorite salsa or avocado mash.
It's a small step that makes the morning feel just a little more joyful and less like a "mad dash" to the car.
Garnish Ideas: Freshly chopped cilantro for a pop of green. A sprinkle of flaky sea salt on the outside of the tortilla if you've crisped it in a pan. Pickled red onions for a bright, acidic crunch that cuts through the rich sausage.
By taking these extra sixty seconds, you're not just eating a prepped meal; you're enjoying a carefully crafted breakfast that happens to be convenient. It’s all about creating that effortless, morning oriented vibe that sets a positive tone for the rest of your day.
These make ahead breakfast burritos are your ticket to a better morning routine.
Very High in Sodium
1145 mg of sodium per serving (50% of daily value)
The American Heart Association recommends limiting sodium intake to less than 2,300mg per day, with an ideal limit of about 1,500mg per day for most adults.
Tips to Reduce Sodium
-
Choose Lower Sodium Sausage-25%
Opt for reduced sodium or no-salt added breakfast sausage. This is the biggest contributor to sodium in this recipe.
-
Use Less Cheese-15%
Reduce the amount of sharp cheddar cheese by half. Sharp cheddar is particularly high in sodium, so this makes a significant difference.
-
Cut Back on Added Salt-20%
Eliminate the 0.5 tsp of kosher salt entirely. The sausage and cheese already provide ample saltiness.
-
Rinse Black Beans Thoroughly-5%
Even though the recipe states rinsed and dried, ensure you rinse canned black beans extremely well under running water. This removes excess sodium from the canning liquid.
-
Boost Flavor with Herbs and Spices
Enhance flavor by increasing the smoked paprika and cumin, and add fresh herbs like cilantro or parsley. This adds flavor without sodium.
Recipe FAQs
How far in advance can you make breakfast burritos?
You can prepare these up to 3 months in advance. Stored in the freezer properly, they retain their texture and flavor profile for this entire duration.
How to prep breakfast burritos so they don't get soggy?
Spread the filling onto a rimmed baking sheet to cool for 15 minutes before rolling. Bringing the ingredients to room temperature prevents steam condensation inside the tortilla, while placing the shredded cheese directly against the flour surface creates a vital moisture barrier.
Can you make-ahead Breakfast Burritos and freeze them?
Yes, they are designed specifically for freezer storage. Wrap each burrito individually in parchment paper and then aluminum foil to maintain quality and prevent freezer burn.
Can a diabetic have a breakfast burrito?
Consult with your healthcare provider regarding your specific dietary needs. While this recipe features protein rich sausage, eggs, and fiber filled black beans, a medical professional can best determine how these ingredients fit into your personal nutrition plan.
Is it true I must leave the vegetables slightly raw to keep them crunchy?
No, this is a common misconception. You should perform a 'Hard Sear' on the peppers and onions until the moisture evaporates and the edges are lightly charred, which provides better flavor and prevents excess liquid from releasing later.
How to ensure the eggs stay velvety after reheating?
Scramble your eggs over medium low heat until just set but still tender. Removing them from the skillet at this stage prevents overcooking during the initial scramble and ensures they remain moist when you eventually reheat the frozen burrito.
How to prevent the sausage filling from making the tortilla mushy?
Drain all excess fat thoroughly after browning the ground breakfast sausage. Removing this rendered fat is essential to keep the filling dry and structural integrity of the tortilla intact during the freezing and reheating process.
make ahead Breakfast Burritos