Baking Dish Ice Cream Cake with Cake Mix
- Time: 30 min active + 13 hours chilling
- Flavor/Texture Hook: Fudgy chocolate base with a crunchy cookie middle
- Perfect for: Birthday parties, potlucks, or beginner bakers
- Why the Layers Hold
- Ingredient Deep Dive
- Your Ingredient List
- The Right Tools
- Putting the Cake Together
- Tips for Better Layers
- Mix and Match Flavors
- Getting the Texture Right
- Troubleshooting Common Issues
- Adjusting the Batch Size
- Common Baking Myths
- Keeping It Frozen
- How to Plate This
- How to Actually Nail This
- Recipe FAQs
- 📝 Recipe Card
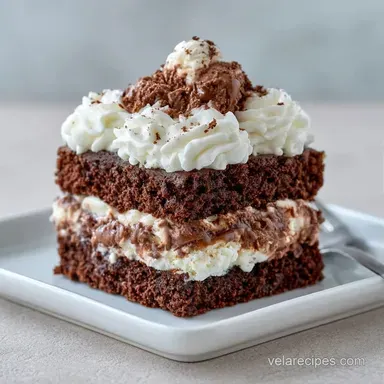
That first slice is the best part. You hear the faint crack of the frozen cookie layer before the knife sinks into the soft, cold cream. The smell of baked chocolate is still there, but it's chilled and rich, making the whole thing feel like a fancy bakery find rather than something made in a 9x13 pan.
I used to try and roll ice cream cakes in springform pans, but they always slumped or leaked. Switching to a baking dish changed everything. You don't have to worry about the sides collapsing, and you can just lift the whole thing out with parchment paper.
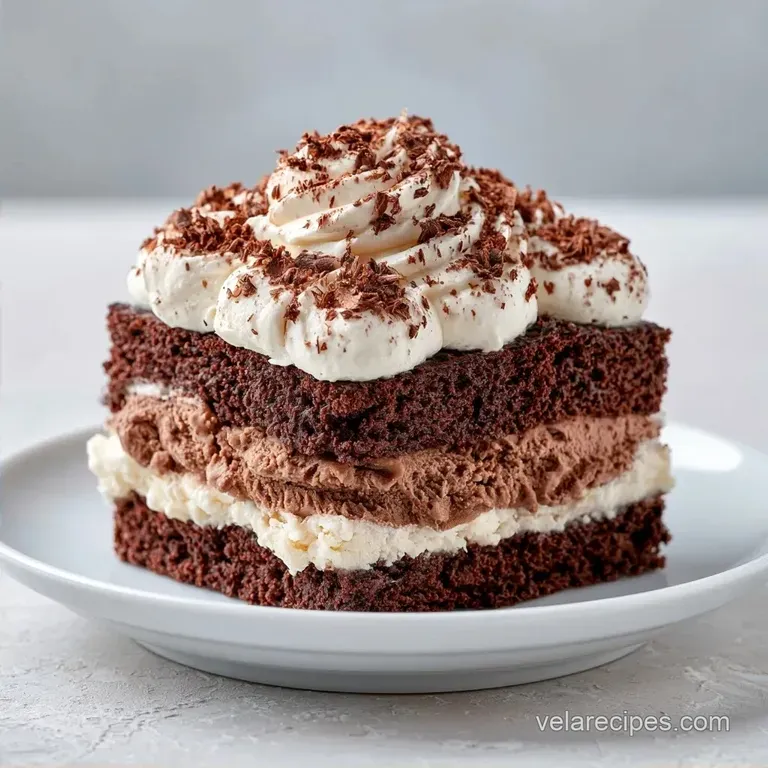
This Baking Dish Ice Cream Cake is about layering textures. You get the soft cake, the crunch of buttery cookies, and the smooth chill of two different ice creams. It's designed to be foolproof, so you can focus on the toppings.
Why the Layers Hold
- Butter Bound Cookies: The melted butter binds the cookie crumbs into a solid wall. This keeps the ice cream from soaking directly into the cake.
- Staged Freezing: Freezing the vanilla layer for 30 minutes creates a firm base. This prevents the chocolate ice cream from mixing in and creating a muddy swirl.
| Feature | Cake Mix Shortcut | From Scratch Cake |
|---|---|---|
| Prep Time | 10 minutes | 30 minutes |
| Texture | Uniform and soft | Denser and heartier |
| Reliability | High consistency | Varies by altitude/oven |
Ingredient Deep Dive
| Ingredient | What It Does | Best Swap |
|---|---|---|
| Chocolate Cake Mix | Provides the structure | Brownie mix (denser) |
| Heavy Cream | Creates the airy topping | Coconut cream (thickened) |
| Sandwich Cookies | Adds the crunch layer | Graham crackers |
| Vanilla Ice Cream | Lightens the flavor profile | Strawberry ice cream |
Your Ingredient List
- 1 box (431g) chocolate cake mix Why this? Standard mix ensures a consistent rise.
- 240ml water
- 3 large eggs
- 115g vegetable oil
- 946ml vanilla ice cream, softened slightly Why this? Softening makes it spreadable without air pockets.
- 946ml chocolate ice cream, softened slightly
- 473ml heavy whipping cream, cold Why this? Cold fat bubbles up better for stiff peaks.
- 100g powdered sugar
- 5ml vanilla extract
- 250g crushed chocolate sandwich cookies Why this? The cocoa in the cookies bridges the cake and ice cream.
- 56g melted unsalted butter
The Right Tools
You don't need a professional kitchen for this. A standard 9x13 inch baking dish is the star here. I highly recommend using parchment paper; it's the only way to get the cake out without it breaking into a million pieces.
For the toppings, a hand mixer or a stand mixer such as KitchenAid works best for the cream. A metal spatula is a lifesaver for smoothing the ice cream. If you use a plastic one, it might bend under the weight of the frozen layers.
Putting the Cake Together
Phase 1: Baking the Foundation
- Preheat oven to 175°C. Line a 9x13 inch baking dish with parchment paper, leaving an overhang on the sides.
- Combine chocolate cake mix, water, eggs, and vegetable oil. Beat on medium speed for 2 minutes until smooth.
- Spread batter evenly into the dish. Bake for 20-25 minutes until a toothpick comes out clean. Let the cake cool completely in the pan. Note: Baking while the cake is hot will melt your ice cream instantly.
Phase 2: Layering the Freeze
- Mix crushed chocolate sandwich cookies with melted unsalted butter. Press firmly onto the cooled cake layer using the back of a spoon.
- Spread half of the softened vanilla ice cream over the cookies. Smooth the top with a spatula and freeze for 30 minutes to set.
- Spread the softened chocolate ice cream over the vanilla layer, ensuring it reaches all four corners.
- Cover the dish with plastic wrap and freeze for at least 12 hours.
Phase 3: The Finishing Touch
- Beat cold heavy whipping cream, powdered sugar, and vanilla extract until stiff peaks form.
- Spread the whipped cream over the frozen cake just before serving and garnish with additional cookie crumbles.
Tips for Better Layers
If you want a cleaner cut, dip your knife in hot water and wipe it dry between every single slice. This prevents the ice cream from dragging into the cake layer. Trust me on this, otherwise, the bottom slice looks like a smudge of chocolate.
Another trick is the "soften test." Your ice cream should be the consistency of soft serve. If it's too hard, you'll tear the cookie layer. If it's too runny, the layers will bleed. Leave it on the counter for about 15 minutes before spreading.
Chef's Note: To avoid air bubbles in your ice cream layers, use a sweeping motion with your spatula. Don't "stir" the ice cream into the cake; push it across the surface.
Mix and Match Flavors

You can easily swap the flavors here. For a "Strawberry Shortcake" vibe, use a vanilla cake mix and strawberry ice cream. If you're feeling fancy, you can add a layer of raspberry jam between the cookies and the vanilla ice cream.
If you want something even lighter, you could try my whipped cream ice cream cake which uses a different ratio of cream. For a handheld version, these techniques are similar to making a Cool Whip ice cream sandwich.
| Original Flavor | Swap | Result |
|---|---|---|
| Chocolate/Vanilla | Mint Chip/Chocolate | Refreshing, "Grasshopper" style |
| Chocolate/Vanilla | Coffee/Caramel | Adult, bittersweet profile |
| Chocolate/Vanilla | Peanut Butter/Chocolate | Rich and salty |
Getting the Texture Right
Troubleshooting Common Issues
| Issue | Solution |
|---|---|
| Why Your Cake Is Soggy | This usually happens if the cake wasn't cooled completely or the cookie layer was too thin. The cookie layer acts as a barrier. If the butter isn't fully mixed into the crumbs, moisture seeps through. |
| Why Your Layers Mixed | This happens when the first ice cream layer didn't set. The 30 minute flash freeze is not optional. Without it, the weight of the second quart of ice cream pushes the first layer around. |
| Why the Cream Collapsed | Warmth is the enemy of whipped cream. If your bowl or beaters are warm, the cream won't hold its structure. Put your mixing bowl in the freezer for 10 minutes before starting. |
Adjusting the Batch Size
Making a Smaller Cake
If you're using an 8x8 inch pan, cut the cake mix and liquids in half. You'll need to beat one egg, then use half of it (about 2 tablespoons). Reduce the bake time by about 5-8 minutes.
Making a Massive Batch
For a party, you can double this into two 9x13 pans. Don't try to make it deeper in one pan, or the middle won't freeze properly. Keep salt and vanilla at 1.5x the original amount rather than doubling them, as they can become overpowering in large volumes.
Common Baking Myths
"You must use a springform pan for ice cream cakes." Not true. A baking dish with parchment paper is actually more stable and easier to serve. It prevents the "lean" that often happens with round cakes.
"store-bought cake mix tastes cheap." In a frozen dessert, the cake is mostly a structural base. Once it's paired with cold ice cream and buttered cookies, the distinct "box" taste disappears.
Keeping It Frozen
Store this in the freezer, tightly wrapped in plastic and foil to prevent freezer burn. It stays good for about 2 months. According to USDA food safety guidelines, keeping frozen desserts at 0°F (-18°C) is key to maintaining texture.
For zero waste, if you have leftover cake mix batter, bake it in a muffin tin for a few mini cakes. If you have extra whipped cream, fold in some of the crushed cookies to make a quick dip for fresh berries.
How to Plate This
Depending on who you're serving, you can change the look. Since we used a baking dish, the "sheet cake" look is the default, but you can dress it up.
| Level | Approach | Key Tweak |
|---|---|---|
| Simple | Big scoops | Serve in a bowl with a drizzle of chocolate syrup |
| Polished | Clean squares | Cut into 2 inch cubes and top with a single raspberry |
| Restaurant | Plated slice | Use a warm knife for a sharp edge; add a mint leaf |
How to Actually Nail This
The most important part is the temperature. If you're rushing, the cake will be gummy or the ice cream will melt into the base. Be patient with the 12 hour freeze.
One final tip: don't overbeat the whipped cream. Stop as soon as you see stiff peaks. If you go too far, it becomes grainy and buttery, which ruins the lightness of the topping. Just keep an eye on it and you're good to go.
Recipe FAQs
How to get a clean slice through the layers?
Dip your knife in hot water and wipe it dry between every slice. This prevents the ice cream from dragging into the cake layer and keeps the edges sharp.
How to prepare the ice cream for spreading?
Leave the ice cream on the counter for about 15 minutes. It should reach the consistency of soft serve to avoid tearing the cookie layer or bleeding.
Should I add the whipped cream before freezing the cake?
No, wait until just before serving. Spreading the whipped cream at the end keeps it light and prevents it from freezing solid.
How long must the cake freeze to set?
Freeze for at least 12 hours. This allows the cake, cookie, and ice cream layers to bond fully for a stable structure.
How to ensure the cookie crust doesn't shift?
Press the buttered cookie crumbles firmly onto the cooled cake using the back of a spoon. This creates a dense, stable barrier that supports the ice cream.
Is it true the cake should be warm when adding the ice cream?
No, this is a common misconception. The cake must cool completely in the pan first, or the ice cream will melt and bleed into the cake.
What other quick desserts pair well with this cake?
Serve it alongside our melted butter cookies. Both are crowd pleasing treats that work well for large gatherings.
Baking Dish Ice Cream Cake