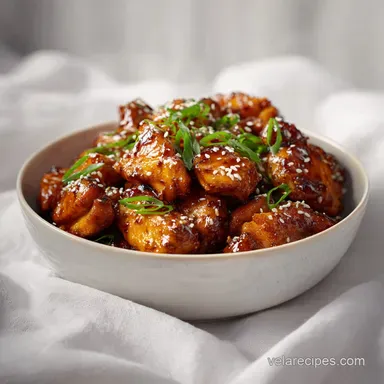
Teriyaki Chicken: Crispy and Caramelized
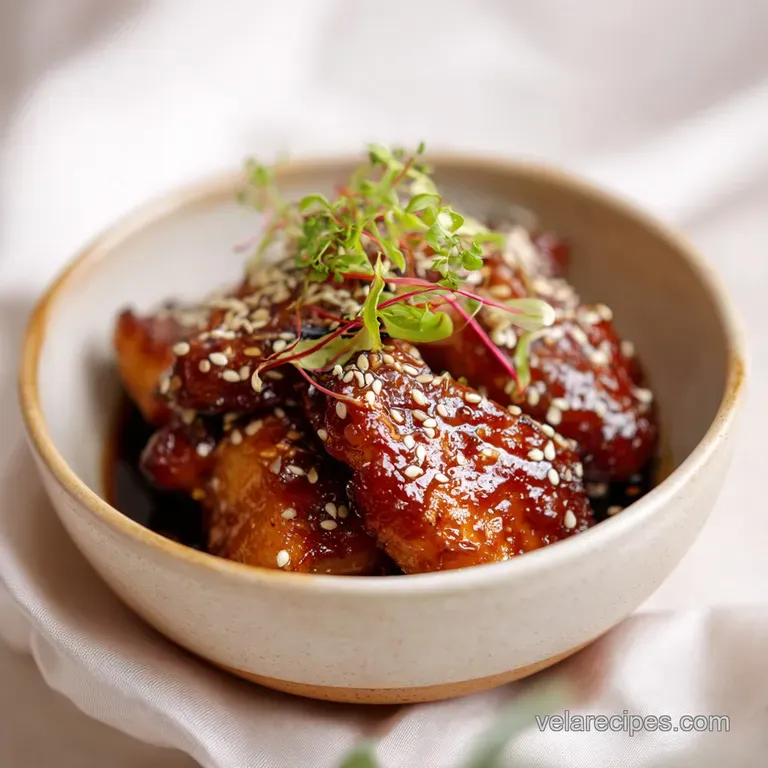
- Time:10 minutes prep + 15 minutes cook = 25 minutes total
- Flavor/Texture Hook: Shatter crisp skin with a velvety, ginger spiced lacquer
- Perfect for: The chaotic weeknight dinner rush
- Mastering a Simple Weeknight Teriyaki Chicken Recipe
- Quick Recipe Specs and Timing
- Essential Ingredients and Substitution Guide
- Required Tools for Crispy Success
- Detailed Steps for Glossy Chicken
- Troubleshooting Glaze and Texture Issues
- Flavor Variations and Healthy Swaps
- Storage Methods and Reheating Tips
- Side Dish Ideas for Dinner
- Debunking Common Teriyaki Myths
- Very High in Sodium
- Recipe FAQs
- 📝 Recipe Card
Mastering a Simple Weeknight Teriyaki Chicken Recipe
The first time I tried making this at home, I followed a random bottle's instructions and ended up with soggy, gray meat that tasted like a salt lick. It was a Tuesday, the kids were circling the kitchen like hungry sharks, and I felt like a total failure.
Then, I realized the secret wasn't some fancy technique - it was all about the mirin and the skin side sizzle. When that chicken skin hits the hot oil, you hear this aggressive crackle that smells like pure comfort. It's the sound of a successful dinner finally happening.
You're going to love how the sauce transforms from a thin liquid into a thick, mahogany glaze that grips the chicken. There's no cornstarch needed here; we rely on the natural reduction of sugars and alcohols to create that signature sheen.
Honestly, once you see that first bubble of the sauce deglazing the pan, you’ll never look at a store-bought bottle again. We are talking about a 25 minute transformation that turns basic pantry staples into a meal that feels like a treat.
We have all been through those nights where the "dinner rush" feels more like a marathon. This dish is my go to because it uses one pan and delivers big on those savory, sweet, and zingy notes we crave. It’s practical, it’s fast, and it’s become a total staple in our house.
Let's get into the details of why this specific method works so much better than the standard "marinate and bake" approach most people take.
Quick Recipe Specs and Timing
Before we start, let's look at the logistics so you aren't caught off guard. I used to think teriyaki needed a long marinade time, but with this pan reduction method, the flavor is built right in the skillet.
| Servings | Ingredient Adjustments | Pan Size | Cook Time |
|---|---|---|---|
| 2 people | 0.75 lb chicken, half sauce | 10 inch skillet | 12 minutes |
| 4 people | 1.5 lbs chicken, full sauce | 12 inch skillet | 15 minutes |
| 6 people | 2.25 lbs chicken, 1.5x sauce | 14 inch skillet | 18 minutes |
This table helps you scale for a solo lunch or a full family gathering. Remember that overcrowding the pan is the enemy of crispiness. If you are doubling the recipe for six people, you might want to sear the chicken in two batches to keep that heat high.
Essential Ingredients and Substitution Guide
The hero of this dish is definitely the mirin. It provides a distinct sweetness and a glossy finish that plain sugar just can't mimic. If you can’t find mirin, try a dry sherry or sweet marsala wine. You could also do some experimenting with dry white wine according to experts at Bon Appetit, but for the most authentic flavor, stick to the Japanese rice wine.
Skin Side Science: The skin on the chicken thighs acts as a self basting mechanism. As it renders, the fat keeps the meat underneath incredibly juicy while the exterior turns into a crispy protective layer.
Sugar Caramelization: Simmering granulated sugar with soy sauce creates a sticky syrup. This process, known as reduction, ensures the glaze coats the chicken instead of pooling at the bottom of the pan.
Alcohol Evaporation: Using sake and mirin introduces complex acids that break down tough proteins. As the alcohol cooks off, it leaves behind a concentrated umami punch that defines a "best homemade teriyaki chicken."
Ginger and Garlic Infusion: Freshly grating these aromatics directly into the liquid allows their oils to emulsify with the soy sauce. This creates a more vibrant, spicy undertone compared to using dried powders.
| Ingredient | Science Role | Pro Secret |
|---|---|---|
| Mirin | Glaze Shine | Gives that "lacquered" look to the final dish. |
| Chicken Thighs | Fat Content | Skin on prevents the meat from drying out at high heat. |
| Sake | Meat Tenderizer | Breaks down fibers for a velvety texture. |
| Soy Sauce | Salt & Umami | Use naturally brewed soy for a deeper color. |
When shopping, try to find "boneless, skin on" thighs. They are a bit harder to find than skinless ones, but you can always buy bone in thighs and quickly pop the bone out with a sharp pair of kitchen shears. Trust me, the skin is non negotiable if you want that "shatter" effect.
- 1.5 lbs boneless, skin on chicken thighs Why this? The skin provides the essential fat for a crispy sear.
- 1 tbsp neutral oil Why this? High smoke point oil like canola prevents burning.
- 0.5 tsp sea salt Why this? Draws out moisture from the skin for better browning.
- 0.25 tsp white pepper Why this? Adds floral heat without the black specks.
- 0.25 cup soy sauce Why this? The backbone of the savory umami flavor profile.
- 0.25 cup mirin Why this? Provides the sweetness and iconic shiny finish.
- 0.25 cup sake Why this? Balances the sugar and tenderizes the protein.
- 2 tbsp granulated sugar Why this? Essential for the sticky, reduced glaze consistency.
- 1 tsp freshly grated ginger Why this? Cuts through the richness with a bright, spicy bite.
- 2 cloves garlic, minced Why this? Adds an earthy depth that rounds out the sauce.
| Original Ingredient | Substitute | Why It Works |
|---|---|---|
| Sake (0.25 cup) | Dry Sherry (0.25 cup) | Similar acidity and alcohol content for tenderizing. |
| Mirin (0.25 cup) | Honey + 1 tsp Vinegar | Mimics the sweetness and acidity of rice wine. |
| White Pepper | Black Pepper | Same heat level, though it looks less "clean" in the sauce. |
If you're looking for more quick stovetop ideas after mastering this, you'll love my Healthy Chicken Skillet for another 25 minute win on busy nights.
Required Tools for Crispy Success
You don't need a kitchen full of gadgets, but a heavy bottomed pan is a must. I usually reach for my 12 inch cast iron or a heavy stainless steel skillet. These materials hold heat much better than thin aluminum pans, which is what we need to get that skin to render properly without boiling the meat in its own juices.
A microplane or a fine grater is also your best friend here. Grating the ginger and garlic instead of just chopping them ensures they melt into the sauce. This way, you get the flavor in every single bite without any chunky, bitter pieces of garlic getting stuck in your teeth.
Finally,, grab a pair of sturdy tongs and a spoon. You’ll be flipping and basting the chicken quite a bit in the final five minutes. The spoon is essential for that "lacquering" process where you repeatedly pour the bubbling sauce over the crispy skin.
It’s a meditative part of the process that makes a world of difference.
Detailed Steps for Glossy Chicken
- Pat the chicken thighs extremely dry with paper towels to ensure a crisp crust. Note: Moisture is the enemy of a good sear; any water left on the skin will create steam instead of crunch.
- Season both sides of the meat evenly with sea salt and white pepper.
- Heat oil in a large heavy bottomed skillet over medium high heat.
- Place chicken skin side down in the pan and sear for 5–7 minutes until the fat renders and the skin becomes deep golden brown. Note: Don't poke or prod the chicken; let it sit so the skin releases naturally from the pan.
- Flip the chicken pieces carefully using tongs.
- Whisk together the soy sauce, mirin, sake, sugar, ginger, and garlic in a small bowl while the second side cooks.
- Pour the sauce mixture directly into the hot pan. Note: The liquid should bubble aggressively immediately upon contact.
- Reduce the heat to medium and simmer the sauce for 4–5 minutes.
- Baste the chicken repeatedly by spooning the sauce over it until the glaze thickens into a glossy lacquer.
- Remove from heat once the chicken reaches an internal temperature of 165°F (74°C).
For nights when you want something even more hands off, these Honey Garlic Chicken Thighs are a total lifesaver and use a very similar flavor profile.
Troubleshooting Glaze and Texture Issues
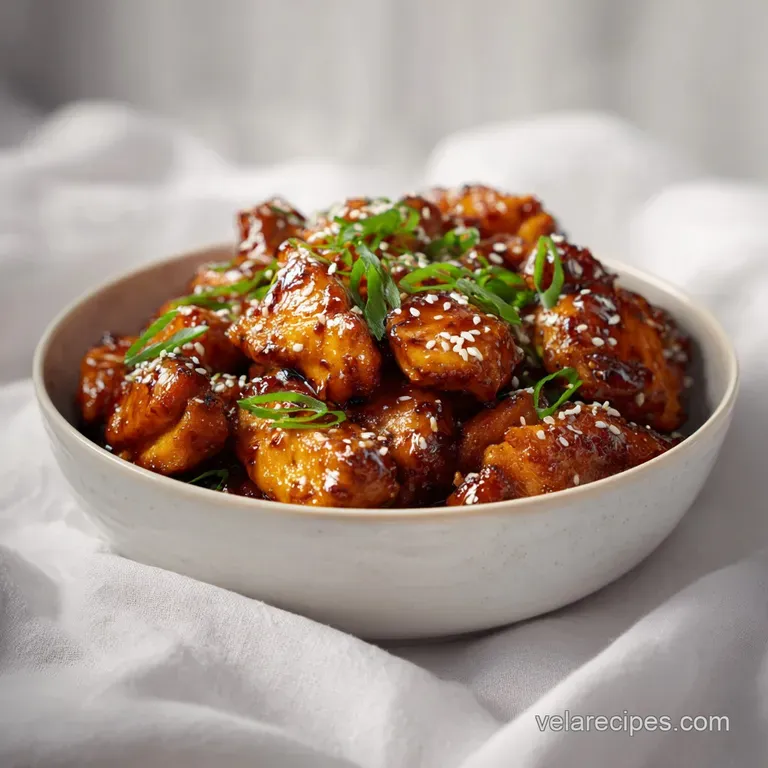
One of the most common hiccups is a sauce that stays too watery. This usually happens if the heat is too low or if you didn't let it simmer long enough. Teriyaki is all about the reduction. If it looks like soup, keep that simmer going for another minute or two.
On the flip side, if the sauce turns into a hard candy consistency, you've gone too far and burnt the sugars.
Sauce Thickness Problems Solved
If your glaze is too thin, it won't cling to the meat, leaving you with a "wet" chicken rather than a "lacquered" one. This is often caused by not allowing the sake and mirin to reduce sufficiently.
The fix is simple: remove the chicken to a plate to prevent overcooking and boil the sauce on high for 60 seconds until it coats the back of a spoon.
Preventing Burned Sugar Bitter Notes
Sugar burns quickly once the water in the sauce evaporates. If you notice the bubbles getting very large and the color turning a dark, scorched black, quickly add a tablespoon of water or sake to "loosen" the sauce and kill the heat. You want a mahogany color, not a charcoal one.
| Problem | Root Cause | Solution |
|---|---|---|
| Soggy Skin | Not enough drying or low heat | Pat dry with towels and ensure the oil is shimmering. |
| Thin Glaze | Under reduction of sugars | Simmer longer or remove chicken and boil sauce alone. |
| Bitter Taste | Burnt garlic or sugar | Add a splash of water and lower the heat immediately. |
Common Mistakes Checklist
- ✓ Never crowd the pan; leave at least an inch of space between chicken pieces.
- ✓ Avoid using "Lite" soy sauce if possible, as it lacks the body needed for a thick glaze.
- ✓ Don't skip the "pat dry" step, even if the chicken looks dry out of the package.
- ✓ Use a thermometer to hit 165°F exactly; overcooked thighs become rubbery.
- ✓ Grate your ginger fresh; the bottled stuff is often stored in vinegar, which ruins the balance.
Flavor Variations and Healthy Swaps
If you want a Healthy Teriyaki Chicken Recipe twist, you can easily swap the granulated sugar for a smaller amount of honey or even maple syrup. While it won't be "authentic Japanese teriyaki chicken" in the strictest sense, the natural sugars still provide a decent glaze.
Just be aware that honey burns faster than white sugar, so keep a close eye on that pan.
For those who prefer Oven Baked Teriyaki Chicken, you can sear the skin in the pan first, then transfer the whole skillet to a 400°F (200°C) oven. Pour the sauce over the chicken and bake for about 10 minutes.
This method is great if you are cooking for a larger crowd and don't want to stand over the stove basting. The texture is slightly different more "roasted" than "seared" but still delicious.
Comparison of Cooking Methods
| Method | Time | Texture | Best For |
|---|---|---|---|
| Stovetop | 15 minutes | Maximum skin crunch | Quick weeknight meals |
| Oven Baked | 20 minutes | Evenly cooked meat | Large batch meal prep |
| Air Fryer | 12 minutes | Very crispy edges | Small servings for two |
Storage Methods and Reheating Tips
Teriyaki chicken actually keeps remarkably well, which makes it a dream for meal prep. The sauce acts as a preservative and keeps the meat moist even after a few days in the fridge.
Storage: Keep leftovers in an airtight container in the refrigerator for up to 3 days. If you want to freeze it, I recommend slicing the chicken first. It will stay good in the freezer for up to 2 months.
Reheating: To maintain that skin texture, avoid the microwave if you have the time. Instead, pop the chicken into a toaster oven or a regular oven at 350°F (180°C) for about 8 minutes.
If you must use a microwave, cover it with a damp paper towel to keep the meat from turning into leather, but accept that the skin will be soft.
Zero Waste Tip: Don't toss those ginger peels! I keep a small bag of ginger scraps in the freezer. They are perfect for dropping into a pot of boiling water for a quick ginger tea or for flavoring a basic chicken stock later in the week.
Side Dish Ideas for Dinner
To balance out the salty sweet intensity of this simple chicken teriyaki sauce, you need something neutral. A bowl of fluffy jasmine rice or brown rice is the classic choice. The rice acts like a sponge, soaking up every last drop of that liquid gold glaze.
If you want to keep things light, a quick stir fry of bok choy, snap peas, and carrots works beautifully. I often just throw some broccoli florets into the pan during the last 3 minutes of simmering so they steam right in the teriyaki sauce.
It saves me from washing another pot and ensures the veggies are packed with flavor.
Chef's Tip: Sprinkle some toasted sesame seeds and thinly sliced green onions over the top right before serving. The "pop" of the seeds and the bite of the onions add a fresh layer that cuts through the rich glaze perfectly.
Debunking Common Teriyaki Myths
One huge myth is that you need cornstarch to thicken the sauce. While many Americanized versions use a cornstarch slurry, an authentic japanese teriyaki chicken relies entirely on the reduction of sugar and mirin. Skipping the starch gives you a cleaner, more intense flavor and a much shinier finish.
Another misconception is that the chicken needs to marinate overnight. Because we are reducing the sauce in the pan, the flavor is incredibly concentrated. A long marinade can actually draw moisture out of the chicken, making it tough.
The pan searing method ensures the meat stays juicy while the outside gets all that bold flavor in a fraction of the time.
Finally, people often think you can't get crispy skin and a thick sauce at the same time. The trick is the order of operations: sear the skin first until it's "set," then add the sauce. The skin stays crisp because the fat has already been rendered out, creating a barrier that the sauce can't easily penetrate.
It’s all about the timing!
Very High in Sodium
1095 mg of sodium per serving (48% of daily value)
The American Heart Association recommends limiting sodium intake to no more than 2,300mg per day, with an ideal limit of less than 1,500mg for most adults.
Tips to Reduce Sodium
-
Choose Low-Sodium Soy Sauce-20%
Replace regular soy sauce with a low-sodium version. This is the biggest contributor to sodium in this recipe and can significantly reduce your intake.
-
Reduce Added Salt-15%
Cut the sea salt from 0.5 tsp to 0.25 tsp. You can always add more salt at the table if needed, but this initial reduction is substantial.
-
Dilute Mirin and Sake-10%
Consider using half the amount of mirin and sake or diluting them with water. These ingredients, especially mirin, can contain added sodium.
-
Boost Flavor with Herbs and Spices
Amplify the natural flavors by adding more fresh ginger and garlic. Consider adding a pinch of red pepper flakes for a little heat, or fresh cilantro for brightness.
Recipe FAQs
What is the secret to perfect Teriyaki Chicken?
Pat the chicken skin side extremely dry with paper towels. This is the key to rendering the fat and achieving a deep, golden brown crust rather than steaming the meat.
What ingredients do you need for Teriyaki Chicken?
Use 1.5 lbs of boneless skin-on chicken thighs, neutral oil, sea salt, and white pepper. The sauce base consists of soy sauce, mirin, sake, granulated sugar, freshly grated ginger, and minced garlic.
Do you add teriyaki sauce before or after cooking chicken?
Add the sauce after the chicken is seared and flipped. Pouring the mixture into the hot pan allows you to deglaze the skillet and coat the chicken as the liquid simmers and thickens into a glossy glaze.
Do you need to marinate chicken for Teriyaki Chicken?
No, marinating is unnecessary for this recipe. The flavor comes from simmering the chicken in the sauce, which glazes the meat and intensifies the flavor while it cooks.
How to fix a teriyaki glaze that is too watery?
Increase the simmer time to reduce the liquid. Continue basting the chicken over medium heat for an additional minute or two until the sugars concentrate and the sauce reaches a lacquer like consistency.
Is it true I must leave the chicken in the fridge overnight to get good flavor?
No, this is a common misconception. Because you simmer the meat directly in the soy, mirin, sake, and ginger mixture, the chicken absorbs all necessary flavor in the final 4 5 minutes of cooking.
How to reheat leftovers while keeping the skin texture crisp?
Reheat the chicken in an oven or toaster oven at 350°F. Avoid using the microwave, as it will make the skin soft and rubbery rather than maintaining the desired texture.
Homemade Teriyaki Chicken