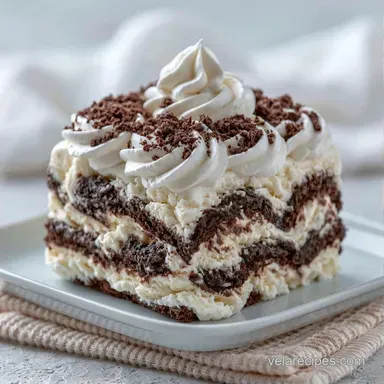
No Bake 4 Ingredient Ice Cream Cake
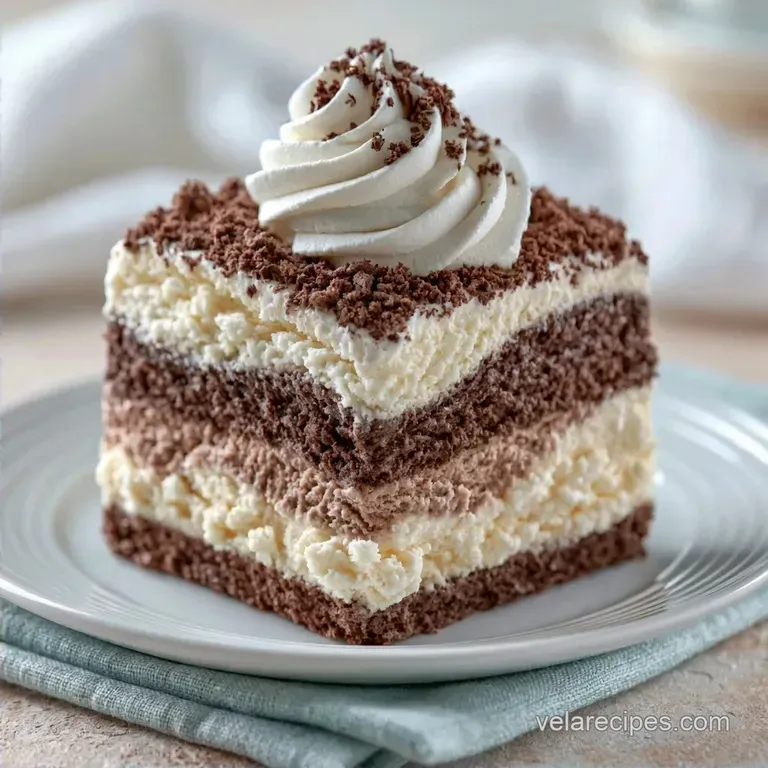
- Time:15 minutes active + 6 hours 15 mins chilling
- Flavor/Texture Hook: Shattering chocolate crunch against cloud like cream
- Perfect for: Last minute party hosting or beginner bakers
That sound of a frozen cookie cracking under a knife is the best part of this whole process. I remember the first time I brought a homemade version to a potluck. Everyone expected me to spend all day in the kitchen, but I'd actually just thrown things in a pan and let the freezer do the heavy lifting.
It's a quick win that looks like it came from a fancy bakery. You get the rich chocolatey hit and the cold, creamy center without any of the stress. This 4 Ingredient Ice Cream Cake is a fear free way to handle a crowd.
You'll see a few layers here, but don't let that intimidate you. It's basically just stacking. We'll keep it simple and focused on getting those textures just right.
Easy 4 Ingredient Ice Cream Cake
Pliable Ice Cream: Letting the vanilla soften for 10 minutes prevents you from tearing up your base layer. Stabilized Topping: Using a pre stabilized whipped topping prevents the top from turning into a block of ice.
| Method | Time | Texture | Best For |
|---|---|---|---|
| Fresh Cream | High | Airy/Icy | Short term serving |
| Shortcut | Low | Smooth/Stable | Long term freezing |
What Each Ingredient Does
| Ingredient | Role | If You Don't Have It |
|---|---|---|
| Ice Cream Sandwiches | Structural base | Chocolate wafers + frosting |
| Vanilla Ice Cream | Main creamy body | Strawberry or Mint ice cream |
| Sandwich Cookies | Texture contrast | Crushed pretzels or brownies |
| Whipped Topping | Light finish | Stabilized whipped cream |
The Ingredient List
- 1 package (12 oz / 340 g) chocolate ice cream sandwiches Why this? Provides a sturdy, cake like bottom.
- Substitute: Chocolate wafers with a layer of fudge.
- 1 quart (946 ml) premium vanilla ice cream Why this? High fat content ensures a smooth melt.
- Substitute: Any premium flavored ice cream.
- 1 cup (120 g) crushed chocolate sandwich cookies Why this? Adds a necessary shattering crunch.
- Substitute: Crushed Oreos or chocolate wafers.
- 2 cups (450 g) stabilized whipped topping Why this? Holds its shape after freezing.
- Substitute: Heavy cream whipped with powdered sugar.
Essential Kitchen Gear
No specialized equipment is necessary for this. A standard 8x8 or 9x9 inch pan is ideal. Use parchment paper to ensure the cake lifts out easily without sticking. While an offset spatula is perfect for smoothing the top, the back of a spoon works just as well.
Assembling Your Cake
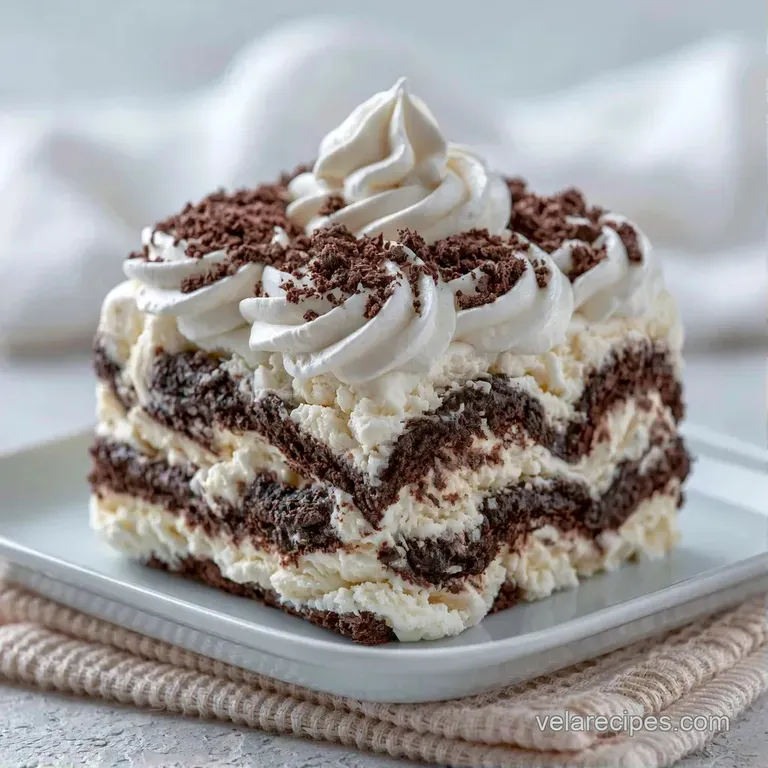
- Line your pan with parchment paper. Leave an overhang on the sides so you can hoist the cake out later.
- Arrange the ice cream sandwiches side by-side at the bottom. If you see gaps, break a sandwich into smaller bits to fill them until the base is a solid, mahogany colored slab.
- Set your vanilla ice cream on the counter for 5-10 minutes. Wait until it is pliable but not liquid.
- Scoop the ice cream over the sandwiches. Use your spatula to spread it into an even layer, pressing the edges firmly against the pan.
- Sprinkle the crushed chocolate cookies over the ice cream. Press them down gently with your palm until they adhere to the cream.
- Spoon the whipped topping over the cookies. Smooth the surface until it is level and glossy.
- Move the pan to the freezer for at least 6 hours. You can leave it overnight to ensure the layers fuse.
- Lift the cake out using the parchment handles.
Solving Texture Issues
Softening a Frozen Cake
If the cake remains in the freezer for more than 24 hours, it may become too firm to slice. Let it rest on the counter for 5-10 minutes before cutting. This slightly softens the edges to ensure a smooth glide.
Achieving Clean Slices
Dull blades will tear through the cream and crush the cookies. Rinse your knife in hot water and dry it off before every slice. This prevents the ice cream from clinging to the metal.
Stabilizing Soft Layers
If the cake feels wobbly when you lift it, it likely hasn't frozen long enough. Return it to the freezer for another hour. The layers must fuse into a single unit to maintain their structure.
Fun Flavor Twists
Want something different? Try a mint chocolate version by swapping the vanilla ice cream for mint chip. For a fruity vibe, use strawberry ice cream and top it with fresh sliced berries. If you're feeling fancy, you can look at my no bake ice cream cake for more inspiration.
For those who love a specific brand of topping, an easy Cool Whip version keeps things very stable. To keep the top from collapsing, according to Serious Eats, stabilizing your cream with a bit of gelatin or cornstarch is the way to go if you aren't using a store-bought topping.
| Original Ingredient | Substitute | Why It Works |
|---|---|---|
| Vanilla Ice Cream | Coffee Ice Cream | Similar fat content. Note: Adds a bold, bitter edge |
| Choc Cookies | Crushed Peanuts | Adds salt and crunch. Note: Changes flavor profile |
| Whipped Topping | Mascarpone Blend | Richer taste. Note: Much denser than topping |
Freezer and Storage
Keep this cake in the freezer. Store it in the pan or transfer it to an airtight container, but leave the topping exposed if you're serving it within two days to avoid "freezer burn" crystals. It stays fresh for up to 2 months.
To avoid waste, if you have leftover crushed cookies, toast them in a pan with a bit of butter and cinnamon. They make a great topping for morning yogurt or oatmeal.
Serving for Impact
- Bright Red
- Add fresh raspberries on top right before serving.
- Vibrant Green
- Tuck a few small mint leaves around the edge.
- Deep Brown
- Shave some dark chocolate curls over the white topping.
Add these garnishes only when you're ready to eat. If you put the berries on before freezing, they can become mushy and bleed into the white cream.
Why This Setup Works
Most people make the mistake of using fresh whipped cream. Fresh cream has too much water, which turns into ice crystals. A stabilized topping stays fluffy and velvety even at zero degrees.
The temperature gap is also key. If you spread ice cream that's too cold, you'll rip the bottom sandwiches. If it's too warm, the layers will bleed into each other. That 10 minute window on the counter is the window to success.
Recipe FAQs
How to assemble this cake quickly?
Line your pan with parchment and stack the layers. Arrange ice cream sandwiches at the bottom, spread vanilla ice cream, add crushed cookies, and finish with whipped topping.
What is the trick for a smooth ice cream layer?
Let the ice cream soften for 10 minutes. This makes it pliable enough to spread with a spatula without tearing the sandwich base.
How much vanilla ice cream is required?
One quart is the ideal amount. This quantity provides enough volume to create a consistent layer across the base for 12 servings.
Is it true you need an ice cream maker for this?
Actually, no. This recipe uses premium store-bought ice cream to eliminate the need for churning.
Can you prevent the topping from freezing solid?
Use a stabilized whipped topping. This specific ingredient prevents the top layer from turning into a block of ice during the 6-hour freeze. If you like this style of assembly, try our creamy sandwich version.
Which cookies work best for the crunch layer?
Chocolate sandwich cookies provide the best contrast. They create a shattering crunch that separates the cream from the topping.
Do I need to bake the base to keep it sturdy?
False. The frozen ice cream sandwiches act as a natural structural base, removing the need for a baked crust.
4 Ingredient Ice Cream Cake