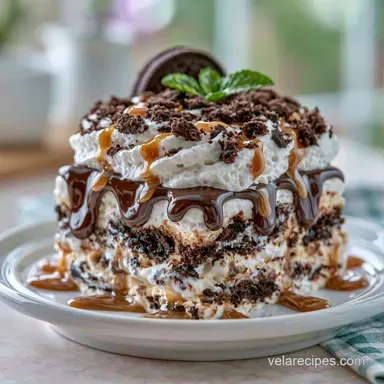
Easy Ice Cream Sandwich Dessert with Oreos
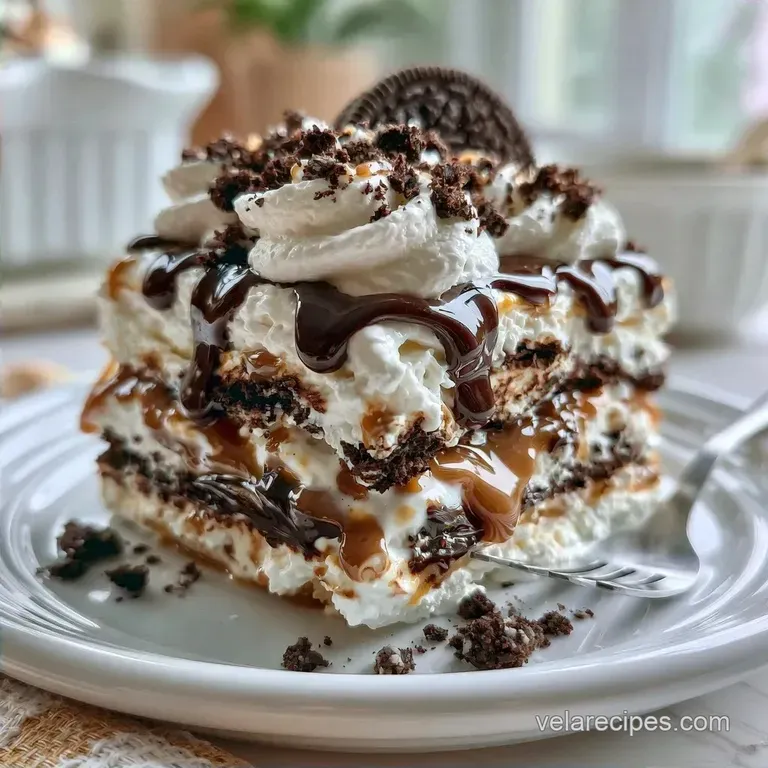
- Time:15 minutes active + 4 hours chilling
- Flavor/Texture Hook: Cold, creamy layers with a chocolatey crunch
- Perfect for: Summer potlucks or kid friendly parties
The smell of toasted wafers and the sound of a freezer door clicking open always take me back to my aunt's backyard parties in the 90s. She had this massive glass tray of frozen treats that everyone crowded around the second the sun hit its peak.
It wasn't about fancy plating back then, just the sheer joy of a cold, sugary slab of cake that didn't require a stove.
That nostalgia is exactly what I wanted to capture here. You get that same childhood feeling but a bit more texture and a lot less effort. It's a crowd pleaser because it hits every note: salty, sweet, creamy, and crunchy.
This Easy Ice Cream Sandwich Dessert is basically a cheat code for parties. You aren't baking anything from scratch, but because of the layering, it looks like you spent all afternoon in the kitchen. It's a simple assembly job that delivers a heavy, satisfying result.
The Trick Behind the Texture
- Pre Frozen Bases: Using store-bought sandwiches creates an instant structure. These act as the "crust" and "cake" layers, so the dessert doesn't slump when you slice it.
- Fat Based Barriers: The whipped topping and sauces create a layer that stops ice crystals from forming on the cookies. This keeps the wafers from getting too soggy while they freeze.
According to the Serious Eats guide on frozen desserts, maintaining a consistent temperature during assembly is key to preventing the ice cream from melting and then refreezing into a grainy texture.
| Method | Time | Texture | Best For |
|---|---|---|---|
| Fast Assembly | 15 mins | Dense and creamy | Quick party prep |
| Classic Cake | 3+ hours | Airy and soft | Formal dinner |
Recipe Specs
The goal here is stability. You want a dessert that feels substantial but doesn't require a culinary degree to put together. Since there's no heat involved, the "cooking" is all about the freeze.
Trust me on this: don't try to rush the freezing time. If you cut into it at the 2 hour mark, you'll have a delicious soup rather than a sliceable cake. Give it the full window to set.
The Building Blocks
Before we start, make sure your freezer is cleared out. You'll need a flat spot for a 9x13-inch dish.
| Ingredient | What It Does | Best Swap |
|---|---|---|
| Vanilla Ice Cream Sandwiches | Provides the main structure | Chocolate sandwiches |
| Whipped Topping | Adds light, creamy lift | Stabilized whipped cream |
| Hot Fudge Sauce | Adds rich chocolate depth | Chocolate ganache |
| Salted Caramel Sauce | Balances sweetness with salt | Butterscotch sauce |
The Full List
- 24 vanilla ice cream sandwiches (approx. 2 oz / 57g each)
- 16 oz (450g) whipped topping Why this? It stays fluffier than heavy cream when frozen.
- 1 cup (240ml) hot fudge sauce
- 1 cup (240ml) salted caramel sauce
- 1 cup (115g) Oreo crumbs Why this? Provides a necessary gritty contrast to the cream.
- 1/2 cup (75g) mini chocolate chips
Quick Swaps
If you're missing something, don't panic. You can use crushed pretzels instead of Oreos for a salty kick. If you don't have salted caramel, a drizzle of honey or maple syrup works, though it changes the flavor profile to be more floral.
Equipment Needed
You don't need a stand mixer or any high tech gear for this. A simple set of basics will do.
- 9x13-inch baking dish (glass or metal)
- Offset spatula or a large butter knife
- Plastic wrap
- Sharp knife (dipped in hot water for slicing)
Chef's Note: If you don't have a 9x13 dish, a rectangular Tupperware container works just as well, provided it's freezer safe.
Step-by-step Instructions
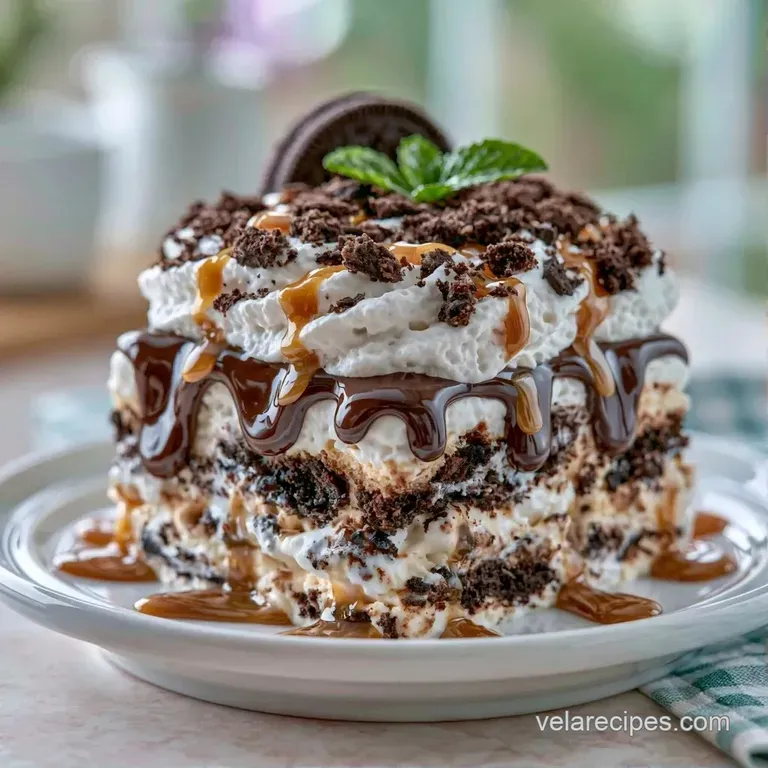
Phase 1: Building the Foundation
- Arrange the Base. Place a single layer of ice cream sandwiches in the bottom of the dish. Press them gently together until there are no large gaps.
- Apply First Cream. Spread half of the whipped topping (8 oz / 225g) over the sandwiches. Note: Push the cream into the crevices so the layers bond.
Phase 2: The Flavor Infusion
- Drizzle Sauces. Pour half of the hot fudge and half of the caramel sauce over the whipped topping. Use a swirling motion until you see distinct ribbons of brown and gold.
- Add First Crunch. Sprinkle half of the Oreo crumbs across the surface.
- Add Second Layer. Place a second layer of ice cream sandwiches on top of the crumbs, pressing them down lightly.
Phase 3: The Final Set
- Finish Topping. Spread the remaining whipped topping over the top layer.
- Final Garnish. Drizzle the rest of the fudge and caramel, then sprinkle the remaining Oreo crumbs and mini chocolate chips on top.
- Freeze. Cover the dish tightly with plastic wrap. Ensure the wrap doesn't touch the topping. Freeze for 4 hours until the cake feels firm to the touch.
Pro Tips & Pitfalls
The biggest hurdle with this dessert is temperature control. If your ice cream sandwiches start to sweat while you're layering, the whole thing can become a bit mushy. Keep the sandwiches in the freezer until the exact second you need them.
Another common issue is the "block" effect. If you press the sandwiches too hard, they can merge into one solid mass that's hard to cut. Just a gentle press is all you need.
Avoiding Soft Slices
If the cake feels too soft after 4 hours, it's likely due to the fudge sauce. Sugar heavy sauces take longer to set. Pop it back in for another hour.
Preventing Topping Crystallization
Air is the enemy of frozen desserts. If you don't wrap the dish tightly, the whipped topping can develop a crust or pick up "freezer smells."
| Problem | Root Cause | Solution |
|---|---|---|
| Slices are falling apart | Not frozen long enough | Freeze for an extra 60 mins |
| Topping is grainy | Temperature fluctuation | Keep freezer door closed |
| Cookies are too soft | Melted during assembly | Work in small batches |
How to Serve and Enjoy
Because this Easy Ice Cream Sandwich Dessert is so versatile, you can keep the presentation simple or make it quite fancy. The secret is all in the slicing. To achieve a tidy, professional cut, rinse your knife in hot water and dry it off before each slice.
Three Plating Styles
| Style | Presentation | Tweak |
|---|---|---|
| Simple | Square slice on a plate | Add a single cherry on top |
| Polished | Rectangular slice with berries | Dust with powdered sugar |
| Restaurant | Small cube with sauce swirl | Add a mint leaf and a wafer |
If you want to experiment, try serving these with warm berries. The contrast of the icy dessert against the warm fruit is a fantastic addition. For more frozen inspiration, my no bake ice cream cake utilizes a similar layering technique.
How to Store and Keep Fresh
This dessert lives in the freezer. It stays good for about 2 weeks, but the Oreo crumbs can start to lose their snap after day 10.
Store it in the original dish, wrapped tightly in plastic. If you have leftovers, cut them into individual squares and wrap them in parchment paper before putting them in a freezer bag. This stops them from sticking together.
For zero waste, if you have leftover Oreo crumbs or chocolate chips, mix them into your morning yogurt or sprinkle them over vanilla ice cream. Don't let those crunchy bits go to waste.
Make It Your Own
You can easily pivot this recipe to fit whatever you have in the pantry. The structure remains the same, but the flavors can shift.
For a Peanut Butter Lover
Swap the salted caramel for a melted peanut butter drizzle. Use peanut butter ice cream sandwiches instead of vanilla for a double dose of nuttiness.
For a Lighter Option
Use a light version whipped topping and swap the Oreo crumbs for toasted almonds or crushed graham crackers. It doesn't remove the calories, but it cuts the heaviness.
For an Oreo Centric Twist
Use Oreo flavored ice cream sandwiches and add a layer of crushed Oreos between every single layer of cream. If you love this style of frozen treat, you might also like the Sandwich Cake for 12 recipe for another easy version.
Decision Shortcut
- More crunch? → Double the Oreo crumbs
- Less sweet? → Use dark chocolate chips
- Different vibe? → Swap vanilla for mint ice cream
Common Frozen Treat Beliefs
You might believe that baking the cookies first is necessary to "set" the treat, but that isn't the case here. The pre-frozen nature of the sandwiches handles that process for you.
While some prefer real whipped cream for the flavor, it often weeps or collapses during the freezing and thawing cycles. For a sturdy structure, a stabilized whipped topping is the superior choice.
This dessert is designed to be approachable. You don't need professional skills to create a stunning result; just assemble, freeze, and enjoy.
Recipe FAQs
How to prevent the topping from melting?
Keep the ice cream sandwiches frozen until the moment of assembly.
Tip: Use a chilled 9x13-inch dish to maintain the temperature during layering.
Is it true this dessert requires overnight freezing?
No, this is a common misconception. It only needs 4 hours to become firm.
Tip: Press the sandwiches gently to eliminate large gaps for a more stable slice.
Can I substitute the whipped topping for homemade cream?
Use a stabilized whipped cream to ensure the layers hold their shape.
Tip: If you prefer a lighter texture, see how we use similar aeration in our whipped cream cake.
Why are the slices crumbling?
The dessert likely didn't freeze for the full 4 hours required.
Tip: Dip your knife in hot water between each cut for perfectly sharp edges.
Easy Ice Cream Sandwich Dessert