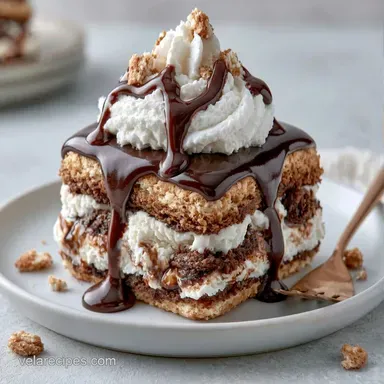
Baking Dish Ice Cream Sandwich Dessert with Cream Cheese
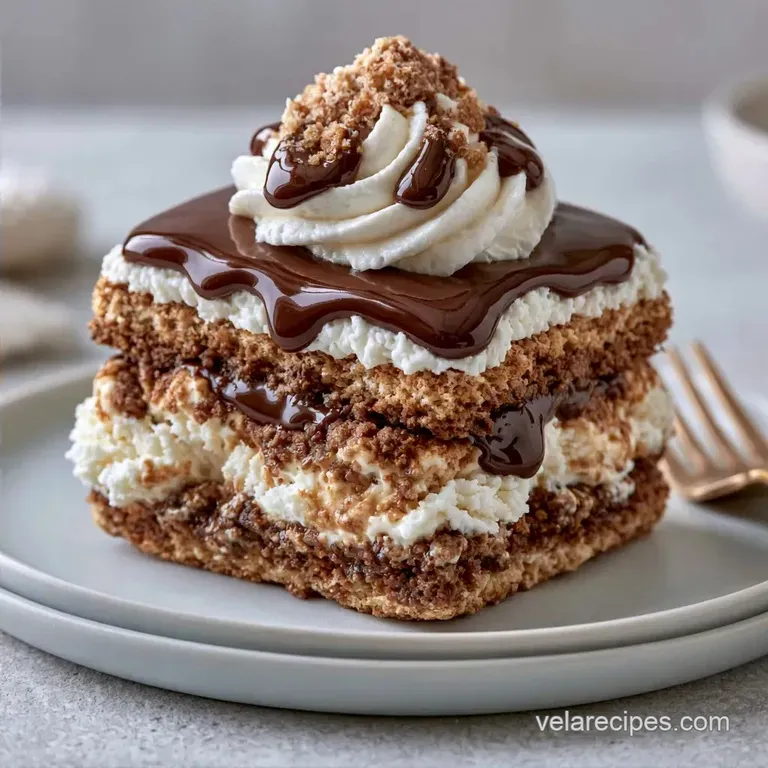
- Time: 15 min active + 4 hrs 15 mins chilling
- Flavor/Texture Hook: Rich cream cheese cloud with a fudgy snap
- Perfect for: Large potlucks or summer family reunions
That first bite of a frozen treat on a humid July afternoon is a core memory for a lot of us. In the US, ice cream sandwiches have always been the king of the freezer aisle, from the nostalgic rectangles in plastic wrap to the fancy ones at the fair.
They're simple, honest, and satisfy that craving for something cold and chocolatey.
I wanted to take that childhood staple and turn it into something that feels a bit more like a party centerpiece. This isn't just about stacking treats in a pan, it's about creating a layered experience that holds its shape.
You're getting a thick base of ice cream, a stable cream layer, and a marbled glaze. This Baking Dish Ice Cream Sandwich Dessert is basically a cheat code for when you want a spectacular result without spending three hours in the kitchen.
Baking Dish Ice Cream Sandwich Dessert
Cold Stability: The cream cheese acts as a binder, preventing the whipped topping from melting into a puddle.
Parchment Slings: Using an overhang allows you to lift the whole dessert out of the pan without it cracking.
| Method | Time | Texture | Best For |
|---|---|---|---|
| Fresh Homemade | 3 hours | Airy and light | Fancy dinner parties |
| Shortcut Mix | 15 mins | Dense and rich | Busy hosts / Kids |
Gathering Your Essentials
For the base, we use store-bought sandwiches. They provide the structure and the chocolate flavor. The middle layer needs a bit of tang to cut through the sugar, which is why we use cream cheese. According to USDA FoodData, the fat in cream cheese helps maintain a stable emulsion when folded with air.
The toppings provide the visual punch. I like using both fudge and caramel to get those deep brown and gold swirls.
The Ingredients
- 15 pre made ice cream sandwiches (approx. 2 lb / 900g)Why this? Provides a consistent, sturdy base
- 8 oz (225g) cream cheese, softenedWhy this? Keeps the topping from weeping
- 1/2 cup (60g) powdered sugarWhy this? Dissolves instantly for a smooth finish
- 1 tsp (5ml) vanilla extractWhy this? Rounds out the dairy flavors
- 2 cups (450ml) whipped toppingWhy this? Holds peaks better than fresh cream
- 1/2 cup (120ml) hot fudge sauceWhy this? Adds a deep chocolate punch
- 1/2 cup (120ml) caramel sauceWhy this? Adds a buttery, salty contrast
- 16 maraschino cherriesWhy this? Adds a bright red pop of color
| Original Ingredient | Substitute | Why It Works |
|---|---|---|
| Cream Cheese (8oz) | Mascarpone (8oz) | Richer and sweeter. Note: Slightly softer structure |
| Whipped Topping (2c) | Heavy Cream (2c) | Natural taste. Note: Must be whipped to stiff peaks; less stable |
| Powdered Sugar | Granulated Sugar | Same sweetness. Note: May leave a grainy texture |
Equipment Needed
You don't need a fancy arsenal for this. A standard 9x9 or 8x8 inch baking dish works best. I highly recommend a metal pan over glass because it chills faster and more evenly in the freezer.
You'll also want a medium mixing bowl and a handheld electric mixer. A silicone spatula is a must for the folding process, as it helps keep the air in the whipped topping. Finally, grab some parchment paper to line the pan, which makes the final lift out a breeze.
The Cooking Process
Phase 1: Building the Foundation
Line your baking dish with parchment paper, leaving a 2 inch overhang on the sides. Arrange the ice cream sandwiches in a tight single layer at the bottom. Use a serrated knife to trim the edges of the sandwiches until they fit snugly against the walls with no gaps.
Phase 2: Whipping the Stabilizer
Place your softened cream cheese in a bowl. Beat the cream cheese, powdered sugar, and vanilla extract on medium speed until the mixture is smooth and creamy. Using a spatula, gently fold in the whipped topping.
Do this slowly until no white streaks remain, but don't overmix or you'll lose the fluff.
Phase 3: The Layering Sequence
Spread the cream cheese mixture over the ice cream sandwiches. Use the back of your spatula to smooth it until the surface is level. Drizzle the hot fudge and caramel sauces over the top. Use a toothpick or knife to swirl them together in a marble pattern.
Phase 4: The Deep Freeze
Cover the dish tightly with plastic wrap to prevent freezer burn. Freeze for at least 4 hours, or overnight, until the dessert feels solid to the touch. Just before serving, place a maraschino cherry on each intended square.
Chef's Tip: To get those perfect swirls, microwave your fudge and caramel for 10 seconds. If they're too thick, they'll just sit on top instead of blending.
Troubleshooting Guide
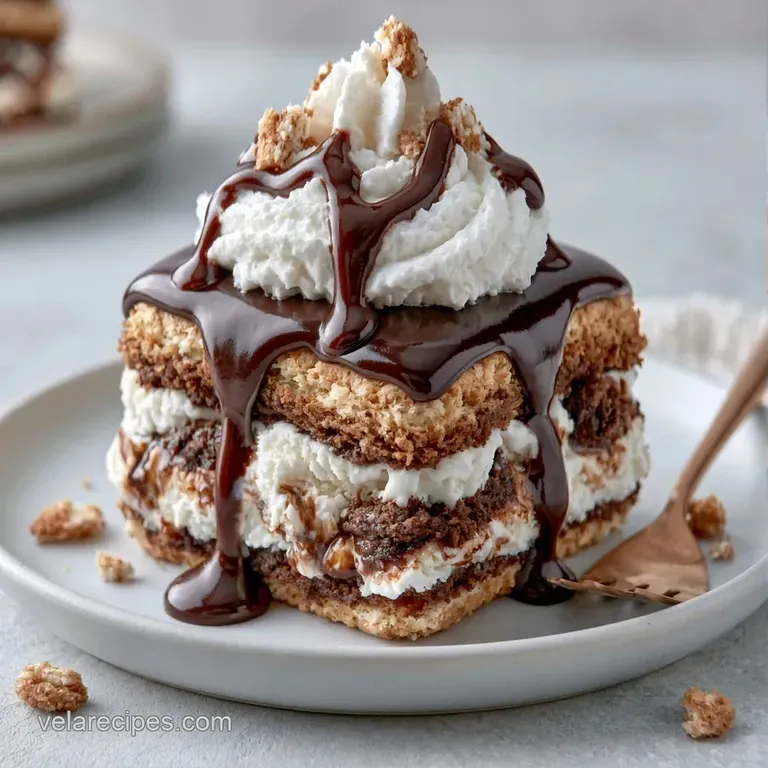
Fixing Rock Hard Slices
If you try to cut into the dessert and the knife just bounces off, it's too cold. Remove it from the freezer and let it sit on the counter for 15 to 20 minutes. This tempering period allows the ice cream to soften just enough for a clean cut.
Preventing Layer Slides
If your layers are sliding apart when you lift the slice, you likely didn't freeze it long enough. Ensure it has a full 4 hours in the freezer. If you're in a rush, you can try using a slightly higher ratio of cream cheese to whipped topping for more grip.
Solving the Pan Gap
When sandwiches don't fit perfectly, you get "holes" where the cream filling sinks. Always trim your ice cream sandwiches with a knife. If you have small gaps, fill them with bits of broken sandwich pieces before adding the cream layer.
Dietary Adaptations
For those who want a different flavor profile, try a peanut butter power up. Swirl in two tablespoons of melted peanut butter with the caramel for a salty sweet vibe. If you're feeling fruity, swap the hot fudge for a raspberry coulis.
If you need a dairy-free version, use vegan ice cream sandwiches and a coconut based whipped topping. You can replace the cream cheese with a cashew based cream cheese alternative. For a lower sugar option, reduce the powdered sugar by half and use a sugar-free caramel syrup.
If you enjoy other chilled treats, you might like this whipped topping dessert for your next gathering. For a more traditional cake feel, my cake mix ice cream cake is a great alternative.
| Goal | What to change |
|---|---|
| Richer Taste | Use Mascarpone |
| Less Sweet | Cut sugar by 25% |
| Added Crunch | Fold in chopped nuts |
Freezing and Reheating Guide
This dessert lives in the freezer. Once assembled, it stays fresh for about one month. To keep it from picking up "freezer smells," make sure the plastic wrap is pressed directly against the surface of the sauce or use a truly airtight container.
Since this is a no bake frozen dish, you never reheat it. To serve, simply slice and plate immediately. If you have leftovers, keep them in a separate airtight container so the main block doesn't have to be thawed and refrozen.
For zero waste, if you have a few broken ice cream sandwiches that didn't fit the pan, don't toss them. Chop them up and stir them into a milkshake or use them as a base for a quick ice cream sundae for the kids.
What to Serve This With
This is a very rich dessert, so it pairs best with things that provide a sharp contrast. A bowl of fresh raspberries or sliced strawberries adds a necessary acidity that cuts through the heavy cream and fudge.
If you're serving this at a party, a pot of strong, unsweetened coffee is the way to go. The bitterness of the coffee balances the sweetness of the caramel and powdered sugar. Some people also enjoy a glass of cold milk on the side to wash down the dense layers.
To make the presentation pop, focus on color balance. The deep brown of the fudge and the creaminess of the center are neutral. Adding the bright red cherries provides a focal point. For extra flair, add a sprig of fresh mint or a dusting of cocoa powder right before the dish hits the table.
Why Most Recipes Get This Wrong
Most people make the mistake of using only whipped cream. While it looks light, whipped cream is mostly air and water. Once it starts to thaw on a serving platter, it loses its structure and the whole thing collapses.
Adding cream cheese changes the game. The higher fat content creates a more stable matrix that holds the air bubbles in place. This means your slice stays upright and looks professional even after sitting out for a while.
Another common error is skipping the parchment paper. Trying to scoop this out with a spoon is a recipe for a mess. The parchment "sling" is the only way to get a clean, rectangular block of dessert.
Recipe FAQs
How to prevent gaps between the ice cream sandwiches?
Trim the edges of the sandwiches with a knife to ensure a tight fit.
Tip: Line the dish with parchment paper first for easier removal.
Which method ensures the cream cheese layer stays smooth?
Beat softened cream cheese, powdered sugar, and vanilla until smooth before folding in whipped topping.
Tip: Use a rubber spatula to fold gently so the mixture stays airy.
Can I freeze this dessert for more than one day?
Keep the dish tightly covered with plastic wrap to prevent freezer burn.
Tip: If you enjoyed the light texture of this whipped layer, see how the same folding technique works in our easy whipped topping dessert.
Is it true that the dessert needs to freeze for only one hour?
False. Freeze for at least 4 hours or overnight to ensure it is solid enough to slice.
Tip: Test the center with a finger to check for firmness before removing from the freezer.
How should I slice the dessert for clean edges?
Dip a sharp knife in hot water and wipe it dry between every cut.
Tip: Garnish with maraschino cherries after slicing to keep them intact.
What is the best way to marble the sauces?
Drizzle hot fudge and caramel sauces over the cream layer using a swirling motion.
Tip: Avoid over mixing the sauces to keep the distinct marbled patterns.
Ice Cream Sandwich Dessert