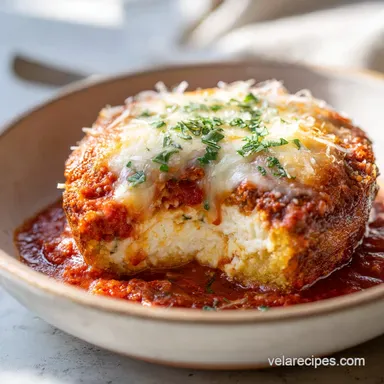
Classic Lasagna with Ricotta: Silky and Savory
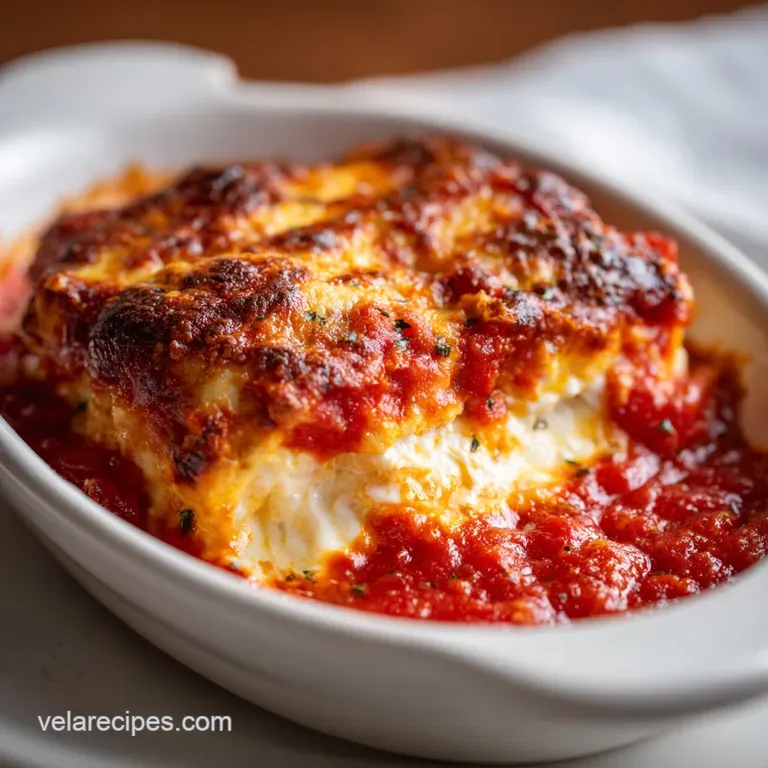
- Time:30 minutes prep + 45 minutes cook + 15 minutes resting = Total 1 hours 30 mins
- Flavor/Texture Hook: Bubbling mahogany cheese crust with silky, distinct layers
- Perfect for: Busy weeknight dinner rush or a comforting family gathering
- Get a Cozy Classic Lasagna Recipe with Ricotta Cheese
- Quick Guide to Your Dinner Timeline
- Component Analysis for Better Flavor
- The Essential Pantry List
- Minimal Tools for Maximum Comfort
- Bringing It Together
- Solving the Common Glitches
- Adjusting for Different Needs
- Kitchen Truths and Misconceptions
- Storage and Zero Waste Guidelines
- Presentation and Finishing Touches
- Critical Sodium Level
- Recipe FAQs
- 📝 Recipe Card
Get a Cozy Classic Lasagna Recipe with Ricotta Cheese
The sound of ground beef hitting a hot skillet that aggressive sizzle is where the magic starts. I remember one particular Tuesday when the kids were fighting, the dog was barking, and I had exactly one hour before the "I'm hungry" chorus started.
I leaned into the aromatics, letting the garlic and onion soften in the beef fat, and suddenly the kitchen felt calm. The scent of dried oregano and simmering tomatoes just has a way of grounding everything.
For me, this isn't just about feeding people; it's about that moment you pull the pan out of the oven and see the cheese bubbling and browned. When you slice into it, you want to see those clean, defined layers, not a slumped pile of pasta.
It's a bit of a balancing act between the moisture of the ricotta and the thickness of the sauce, but once you get the rhythm, it's a breeze.
Trust me, we've all been there with the "lasagna soup" disaster where the layers slide apart on the plate. I used to think I just needed more cheese, but it was actually about the binder and the resting time.
This version focuses on minimal tools and reliable steps, so you can actually enjoy your dinner instead of stressing over the prep. Let's crack on.
Quick Guide to Your Dinner Timeline
Before we dive into the heat, let's look at how this fits into your schedule. Most people underestimate the "rest" period, but it's the most important part of the process. If you cut it too early, the juices run, and you lose that structural integrity we're after.
The total time of 1 hours 30 mins is honest. You've got your active prep and the bake, but the 15 minutes of resting is non negotiable. While the lasagna rests, you can clear the counter or set the table.
It's the perfect window to breathe before the family descends on the dish.
Since we're focusing on efficiency, I've compared the two main ways people handle the "base" of this meal. While the oven does the heavy lifting for the bake, how you treat your sauce determines the final texture.
| Method | Time | Texture | Best For |
|---|---|---|---|
| Stovetop Simmer | 15 mins | Thick and concentrated | Traditional layered bakes |
| Slow Cooker Base | 4 hours | Velvety and integrated | Low effort meal prep |
Right then, once you've picked your path, the assembly is where the fun begins. Just remember that the oven needs to be preheated to 375°F (190°C) before the pan goes in, or you'll end up with soggy noodles.
Component Analysis for Better Flavor
I've spent a lot of time wondering why some lasagnas taste "flat" while others taste like they've been simmering for a day. It usually comes down to how the ingredients interact. For instance, the tomato paste isn't just for color; it concentrates the sugars and acids, giving the sauce a punchy depth that crushed tomatoes alone can't achieve.
Then there's the ricotta. Most people just plop it in, but treating it like a filling rather than a topping changes the game. By adding an egg and some parmesan, you're creating a stable mousse that holds its shape. It's a simple trick that prevents the dreaded "sliding layer" syndrome.
| Ingredient | Science Role | Pro Secret |
|---|---|---|
| Ground Beef | Umami Base | Brown deeply first for better color |
| Ricotta Cheese | Creamy Contrast | Mix in garlic powder for stealthy flavor |
| Large Egg | Structural Binder | Lightly beat first to avoid lumps |
| Tomato Paste | Flavor Concentrator | Sauté with onions to remove the "raw" tin taste |
The Essential Pantry List
Gather everything before you turn on the stove. There's nothing worse than realizing you're out of parmesan while your beef is burning. I prefer using a 9x13 inch baking dish because it provides the ideal depth for the layers without making the center undercooked.
For the Hearty Beef Sauce 1 lb ground beef (80/20 lean) Why this? Fat carries the flavor of the herbs 1 medium yellow onion, diced 3 cloves garlic, minced 28 oz crushed tomatoes 2 tbsp tomato paste Why this? Thickens the sauce and adds
Richness 1 tsp dried oregano 1 tsp dried basil
For the Creamy Ricotta Filling 15 oz whole milk ricotta cheese Why this? Full fat prevents the filling from breaking 1 large egg, lightly beaten 1/2 cup parmesan cheese, freshly grated Why this? Adds a salty, nutty punch 2 tbsp fresh
Parsley, chopped 1/2 tsp garlic powder
For the Assembly & Topping 12 oz lasagna noodles Why this? Standard width fits a 9x13 pan perfectly 4 cups mozzarella cheese, shredded Why this? Low moisture mozzarella melts better
If you find yourself wanting a different twist on these flavors, you might enjoy a Crockpot Lasagna Soup recipe for those days when you want the taste without the layering effort.
Minimal Tools for Maximum Comfort
You don't need a kitchen full of gadgets for this. Honestly, keep it simple. A large skillet for the meat, a medium bowl for the cheese, and your baking dish are the only essentials. If you have a sturdy spatula, you're golden.
I always recommend a heavy bottomed skillet like a cast iron or a deep stainless steel pan to brown the beef. It holds the heat better, which means you get a better sear on the meat rather than just steaming it in its own juices.
For the cheese, a simple whisk or fork works fine to fold everything together.
One tiny tip: use a piece of parchment paper or a clean kitchen towel under your cutting board. It stops the board from sliding around while you're dicing that onion, which is a small detail that saves a lot of frustration during the dinner rush.
Bringing It Together
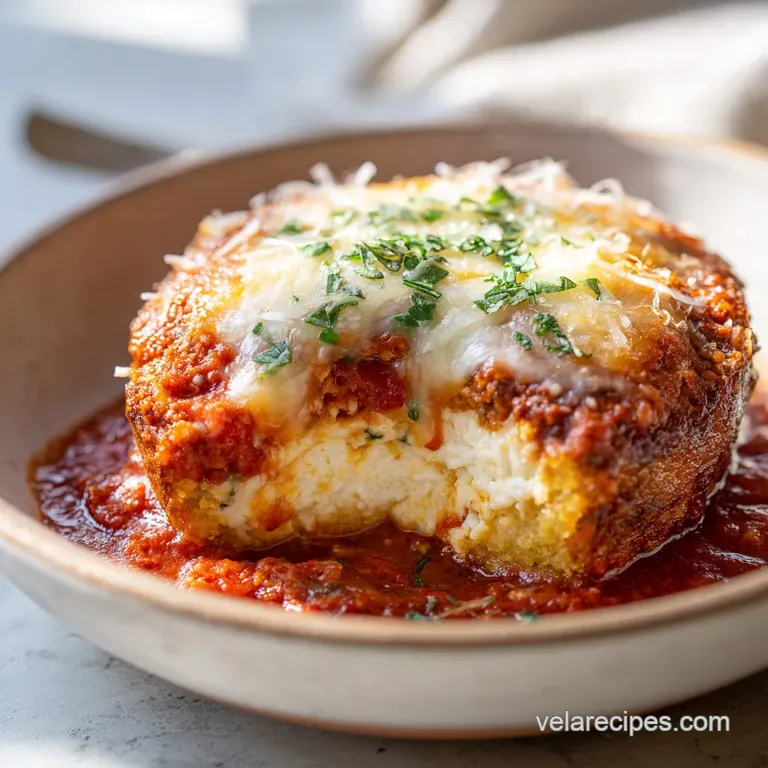
Now, let's get into the flow. This is where we move from raw ingredients to that mahogany topped masterpiece. Pay attention to the smells; when the garlic hits the pan, it should be fragrant, not burnt.
Phase 1: Building the Savory Base
- Heat your large skillet over medium high heat. Add the 1 lb ground beef and cook until deeply browned and sizzling. Drain the excess fat so the lasagna doesn't get oily.
- Stir in the diced onion and minced garlic. Sauté for about 5 minutes until the onion becomes translucent and soft.
- Stir in the 2 tbsp tomato paste, 28 oz crushed tomatoes, 1 tsp dried oregano, and 1 tsp dried basil. Lower the heat and simmer for 15 minutes until the sauce has thickened and looks rich.
Phase 2: Preparing the Ricotta Blend
- In a medium bowl, fold together the 15 oz ricotta cheese, 1 lightly beaten egg, 1/2 cup parmesan, 2 tbsp parsley, and 1/2 tsp garlic powder. Mix until the texture is smooth and velvety. Note: Don't overmix or the ricotta can become too runny.
Phase 3: The Layering Logic
- Spread 1/2 cup of the meat sauce on the bottom of your 9x13 inch baking dish. This prevents the bottom noodles from sticking.
- Place 3-4 noodles over the sauce. Spread 1/3 of the ricotta mixture evenly, then sprinkle 1 cup of mozzarella and top with 1 cup of meat sauce.
- Repeat the layering (noodles, ricotta, mozzarella, sauce) two more times. Be precise with your portions so you don't run out of cheese at the end.
- Finish with a final layer of noodles, the remaining meat sauce, and the remaining mozzarella cheese.
Phase 4: The Golden Bake
- Cover the dish tightly with aluminum foil. Bake at 375°F (190°C) for 25 minutes. Note: Spray the foil with oil so the cheese doesn't stick to it!
- Remove the foil and bake for another 15-20 minutes until the cheese is bubbling and mahogany colored.
- Let the lasagna rest for 15 minutes before slicing. This is the "secret" to those clean, cohesive layers.
Chef's Tip: If you're using no boil noodles, add an extra 1/4 cup of water to your meat sauce. The noodles will absorb that moisture during the bake, ensuring they're tender rather than chewy.
Solving the Common Glitches
Even the best of us hit a snag sometimes. Maybe the cheese didn't brown, or the layers felt a bit loose. It's usually a quick fix that involves adjusting your moisture or your heat.
Why Your Lasagna Is Watery
This usually happens if the ricotta wasn't drained or the sauce was too thin. If you're using a brand of ricotta that seems very liquid, strain it through a fine mesh sieve for 10 minutes before mixing.
| Problem | Root Cause | Solution |
|---|---|---|
| Soupy layers | Sauce simmered for too short a time | Simmer an extra 5-10 mins until thick |
| Ricotta leaking | Egg binder omitted or under mixed | Ensure egg is fully incorporated |
| Soggy bottom | Not enough sauce on base | Use a full 1/2 cup of sauce at the bottom |
The Noodle Texture Struggle
If your noodles are still hard in the middle, you likely didn't cover the dish tightly enough with foil. The steam trapped under the foil is what actually cooks the pasta. Make sure the seal is tight.
Burning the Top Too Fast
If the cheese is turning dark brown but the middle is still cold, your oven might run hot. Lower the temperature by 25°F and extend the uncovered bake time by 5 minutes.
Common Mistakes Checklist
- ✓ Pat your beef dry or drain it well before adding the sauce.
- ✓ Use low moisture mozzarella rather than fresh buffalo mozzarella to avoid excess water.
- ✓ Let the dish rest for a full 15 minutes; cutting early is the #1 cause of "lasagna collapse."
- ✓ Ensure the foil is sprayed with oil to prevent the cheese from pulling away from the dish.
- ✓ Don't skip the tomato paste it's the difference between a thin sauce and a rich one.
Adjusting for Different Needs
You can easily tweak this recipe to fit your household. Whether you're cooking for a crowd or just for yourself, the ratios stay mostly the same, but the physics of the pan change.
Scaling Down (Half Batch) Use an 8x8 inch square pan. Reduce the baking time by about 20% and start checking the cheese at the 10 minute mark after removing the foil. If the recipe calls for one egg, beat it in a cup and use half.
Scaling Up (Double Batch) Don't use one giant pan use two 9x13 inch pans. Increase the salt and dried herbs to 1.5x instead of 2x to avoid an overpowering flavor.
Keep the oven temperature at 375°F, but you may need to add 5-10 minutes to the bake time since the oven is more crowded.
The Low Carb Path Replace the 12 oz of noodles with thinly sliced zucchini strips. If you do this, salt the zucchini first and let them sit for 15 minutes, then pat them dry. This prevents the lasagna from becoming a soup. For a side dish that complements this, try my Garlic Butter Zucchini Noodles for a lighter meal.
The Lean Protein Shift Swap the 80/20 beef for ground turkey or chicken. Since lean meats lack fat, add 1 tbsp of olive oil to the pan before browning to ensure the vegetables sauté properly and the meat doesn't stick.
Kitchen Truths and Misconceptions
There are a lot of "rules" about lasagna that just aren't true. Let's clear a few of them up so you can cook with confidence.
First, you'll hear that you must boil the noodles to the same tenderness as you'd eat them. Actually, if you're using traditional noodles in a sauce heavy recipe, undercooking them by 2 minutes is better. They finish cooking in the oven by absorbing the sauce, which gives them a better bite.
Then there's the idea that searing the meat "seals in the juices." It doesn't. Searing is all about creating a deep, savory crust (that's the Maillard effect, though we'll keep it simple: it's just flavor!). The juices will leave the meat regardless, but the flavor you get from a deep brown sear is worth the effort.
Finally, some say you need a béchamel sauce for an "authentic" lasagna. While that's common in Northern Italy, the ricotta version is a staple in many homes and provides a different, creamier contrast that most people prefer for a cozy dinner.
Storage and Zero Waste Guidelines
Lasagna is one of those rare dishes that actually tastes better the next day. The flavors have more time to mingle, and the structure sets firmly.
Fridge and Freezer Store leftovers in an airtight container in the fridge for up to 4 days. For the freezer, I recommend slicing the lasagna into individual portions and wrapping each piece in foil and plastic wrap. They'll stay fresh for up to 3 months.
Reheating for Freshness To reheat a slice, avoid the microwave if you can. Put it in a small oven safe dish with a splash of water on the side, cover with foil, and bake at 350°F for 15-20 minutes. This keeps the cheese from getting rubbery.
Using Every Scrap If you have a little bit of meat sauce left over, don't toss it. It's perfect over a piece of toasted sourdough or mixed into a bowl of polenta for a quick lunch. If you have leftover ricotta, mix it with a bit of lemon zest and honey for a sweet breakfast spread on toast.
Presentation and Finishing Touches
The difference between a "home meal" and a "wow meal" is usually just five minutes of effort at the end. When the lasagna comes out of the oven, it's a beautiful mahogany brown, but a few fresh hits of color make it pop.
The Clean Slice Secret
To get those professional looking squares, use a sharp serrated knife. Instead of pressing down hard, use a gentle sawing motion. If the cheese is sticking to the knife, dip the blade in hot water between slices. This ensures each piece stays as a perfect cube.
The Finishing Touch
Garnish the top with a handful of freshly chopped parsley or a few basil leaves right before serving. A light drizzle of high-quality olive oil over the cheese crust adds a glossy sheen and a peppery finish that rounds out the richness of the ricotta.
Serve it with a simple green salad to cut through the density of the cheese and pasta.
Critical Sodium Level
1420 mg 1,420 mg of sodium per serving (62% 62% of daily value)
The American Heart Association recommends a daily sodium limit of no more than 2,300 mg, and an ideal limit of no more than 1,500 mg per day for most adults.
Tips to Reduce Sodium
-
Switch to No-Salt Added Tomatoes-20%
Replace the crushed tomatoes and tomato paste with no-salt added versions to eliminate a significant source of processed sodium.
-
Use Low-Sodium Mozzarella-15%
Swap the 4 cups of shredded mozzarella for a low-sodium mozzarella or reduce the total amount of cheese used in the layers.
-
Modify the Ricotta and Parmesan-15%
Choose a low-sodium ricotta and reduce the amount of freshly grated parmesan, which is naturally very high in salt.
-
Enhance with Fresh Herbs
Increase the amount of fresh parsley, basil, and oregano to add depth and flavor without adding any sodium.
Recipe FAQs
What's the secret to a perfect lasagna?
Let it rest for 15 minutes after baking. This allows the layers to set so the lasagna doesn't slide apart when sliced.
What are common lasagna recipe mistakes?
Overfilling the baking dish or skipping the resting period. Excess sauce causes oven spills, while cutting too soon ruins the structural integrity.
Are you supposed to put egg in ricotta for lasagna?
Yes, the egg acts as a binder. It stabilizes the ricotta mixture so the cheese doesn't separate during baking.
Can a diabetic have lasagna?
Yes, but focus on portion control. Emphasize the protein rich cheese and meat layers, similar to the approach in our muffin cups.
How to stop lasagna from being watery?
Simmer the meat sauce for 15 minutes until thickened. This reduces excess liquid and prevents moisture from pooling at the bottom.
Is it true that lasagna must be eaten immediately to taste best?
No, this is a common misconception. Flavors mingle more effectively and the structure firms up when stored overnight.
How to store and reheat leftover lasagna?
Store leftovers in an airtight container in the fridge for up to 4 days. Reheat in an oven safe dish with a splash of water to maintain moisture.
Classic Ricotta Lasagna